Overview
In the article Getting Started with Workflow, we created a process that modelled a request made via your website. The request was started using a form, responded to by an agent who reviewed the request using another form, and finished with a response email generated by the workflow.
In this series of articles we'll:
- Create a User Requests article so the user can check on the progress of the request they made
- Create a Self Service article so agents can review requests
- Make changes in the workflow model to improve the messages and descriptions visible on the articles
- Create summaries of the workflow
This video shows the completed process:
Setting Up User Requests
The User Requests template is designed to be used by registered website users. It allows people to track the requests they have raised. Each request is displayed as a "card". Cards are organised into four sections - requests the user needs to respond to, requests the user might be able to work on, requests currently in progress (being worked on by somebody else), and closed historical requests.
This documentation assumes you have already imported and set up the forms and workflow in Getting Started with Workflow.
Creating the Article
Create an article in iCM using the User Requests template. Give it the heading "View My Requests".
The article extras controls the processes that appear on the article. For this example we'll only display the "simple process" from the Getting Started article.
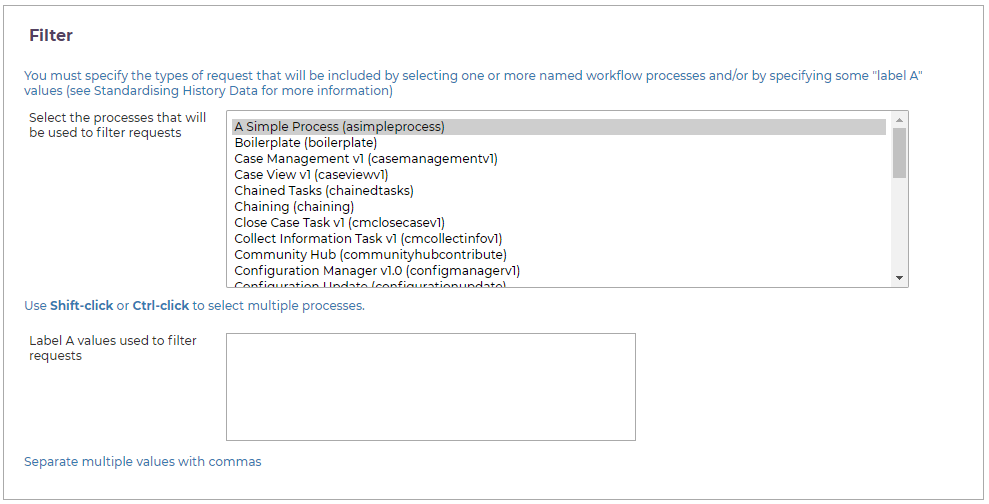
The article should be secured to a group of website users. The template displays information relevant to the current user, which means people need to log into your site so the template knows who they are. Secure the article to the same group of users who are able to start the "simple process".
Viewing Requests
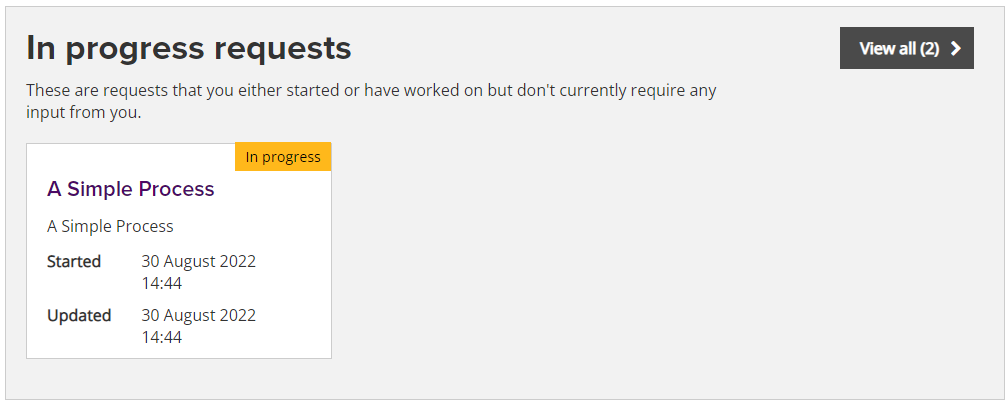
Now, when you are logged in and submit the form that starts the example process, you'll see a card on the User Request article which looks something like this.
Actions and Details
If the current user is eligible to perform any tasks in this process (in this example they aren't), buttons will appear in the card linking to the relevant task forms.
Clicking on the card title displays more information about the request. This can include a summary of the process so far, and a list of events and actions that have taken place since the request started. See the Summaries and History article for more information.
Setting Up Self Service
The main function of the Self Service template is to display lists of tasks that users can claim and carry out.
It's best to use the template in a very focused way, set up specifically to interact with a particular service or to be used by a team. We've found it's often better to have multiple articles using the template, each working with a small set of processes, rather than a single article displaying lots of different things.
This article sets up the Self Service template to be used with our example process from the Getting Started with Workflow article.
Creating the Article
Create an article in iCM using the Self Service template. Give it the heading "Manage Website Enquiries".
The article extras controls the processes and histories that appear on the article. For this example we'll only display the "simple process". Set up your article extras like the screenshot below.
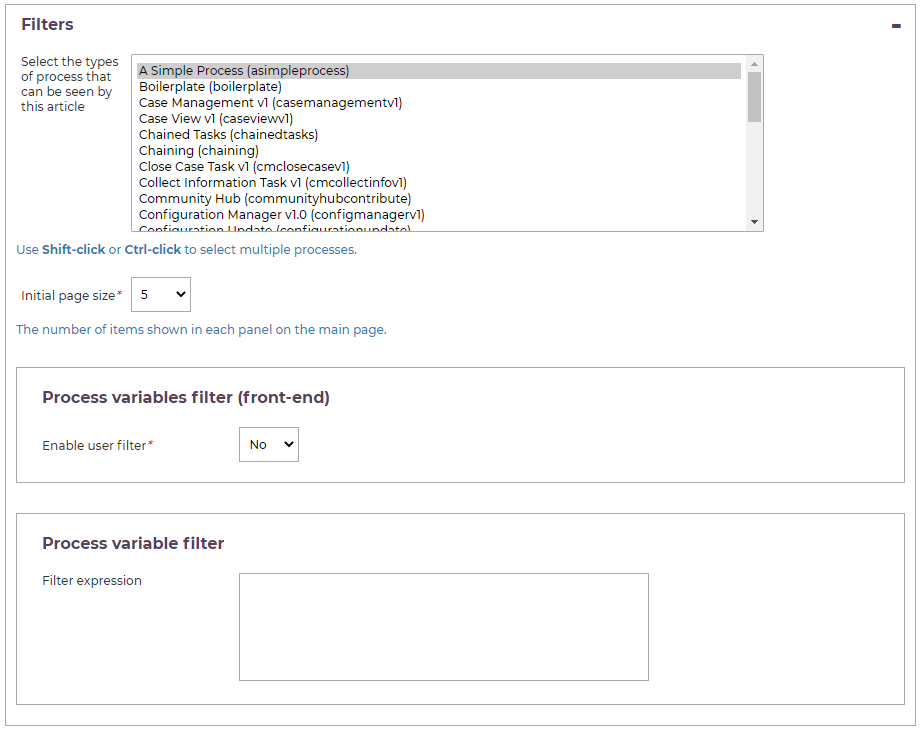
The options above mean that only the example "simple process" will appear in the task lists, and that only histories associated with that process will appear in the history table (if turned on). The descriptions of each history will link through to the workflow history.
For this example enable the "Assigned Tasks" and "Claimable Tasks" panels. Leave all of the settings as their defaults. This will display a list of active requests to our agent and allow them to claim a task to work on it.
Secure the article to the same group of users that is set as the candidate group of the agent task in the workflow model.
Viewing and Claiming Tasks
If you have some active instances of the example process, your self service article should look something like this.
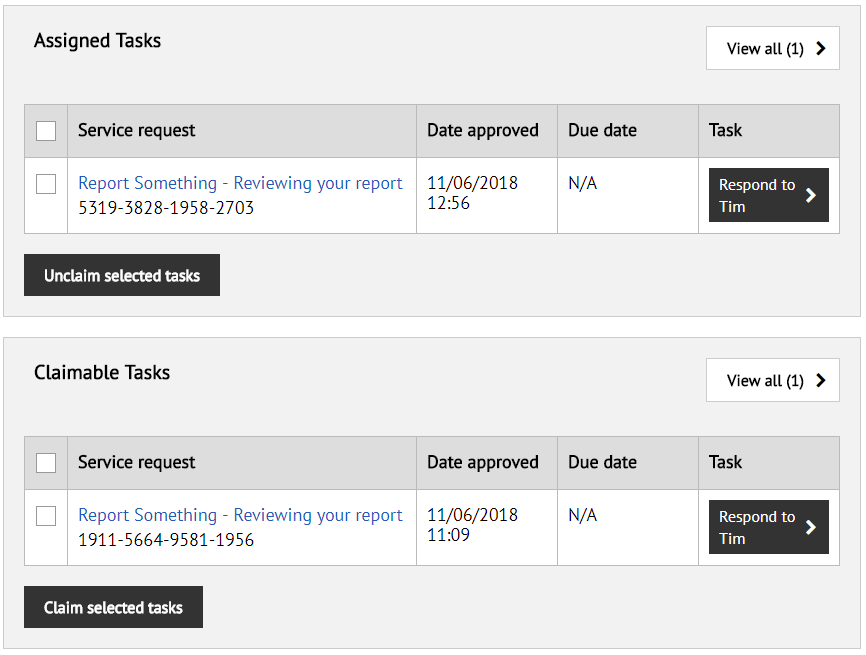
Tasks that aren't being worked on are listed in the claimable tasks table. When an agent claims a task it moves into their assigned tasks panel and can't be seen by anyone else. Only one agent can work on a task at a time. An agent can return a task to the bottom panel by un-claiming it.
Columns
The visible columns and their titles are set in the self service article extras. The information displayed for each request is similar to the information displayed by the User Requests template.
The "Service request" column above displays the process description. This description is exactly the same as the description displayed to the user who submitted the request. It links through to more information about the request. This extra information can include a summary of the process and a list of events and actions that have taken place since the request started. See the Summaries and History article for more information.
Performing a Task
The "Task" column displays the name or description of the next user task in the workflow that needs to be completed. When an agent clicks on a task they are taken to the iCM form set in the user task activity in the workflow model.
Updating Process and Task Descriptions
At the moment the process doesn't look great, especially in User Requests where the same text "A Simple Process" is repeated in both the title and description.

You can update the information displayed in Self Service and User Requests during the lifetime of your process.
The text in bold at the top of the card is the name of our process model (written to the "subject" data of the history of this process instance). The text beneath it is the description of the process model (written to the "historyDescription" of the instance's history).
Updating the Process Description
Open the workflow modeller and edit the "A Simple Process" model. Without selecting any elements the panel at the bottom of the modeller displays the model properties.
Leave the name as "A Simple Process" so it doesn't get confused with any of your real processes. Change the description to

The ## marks are used to flag that a value will be fetched from a process variable. In this case one called PROCESSDESCRIPTION and one called STATUS. We'll set these variables in a script task.
Add a script task between the start event and user task.
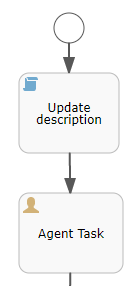
Add the following to the script, then save and deploy your model. For more information about creating process variables see Process Variables.
execution.setVariable('PROCESSDESCRIPTION', "Website Enquiry");
execution.setVariable('STATUS', "Reviewing your request");
Now when a request is raised and viewed in User Requests, it looks like this.
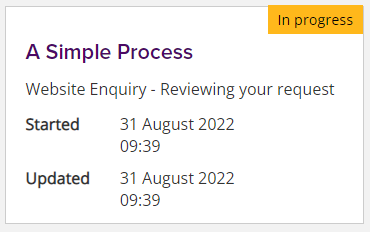
Note that normally a process description overrides the process name wherever the name would normally be output. If a fixed value were added to the description above, you'd see the description used twice (once in bold and once beneath). However, because the ## substitution takes place after the process starts, the name is set as "A Simple Process" and the description is updated later.
Further Updates
A processes description can be updated any number of times during a workflow. Add another script task after the user task to change the status variable to "Request Complete".
Tasks
The user tasks in your workflow process have names and descriptions that behave in exactly the same way as the process name and description.
Try adding a new description to the user task that includes a process variable.
Summaries and History
When a process instance starts it can create a record of what happens during the process using the History Worker. As the instance progresses events and summary events can be logged to that history.
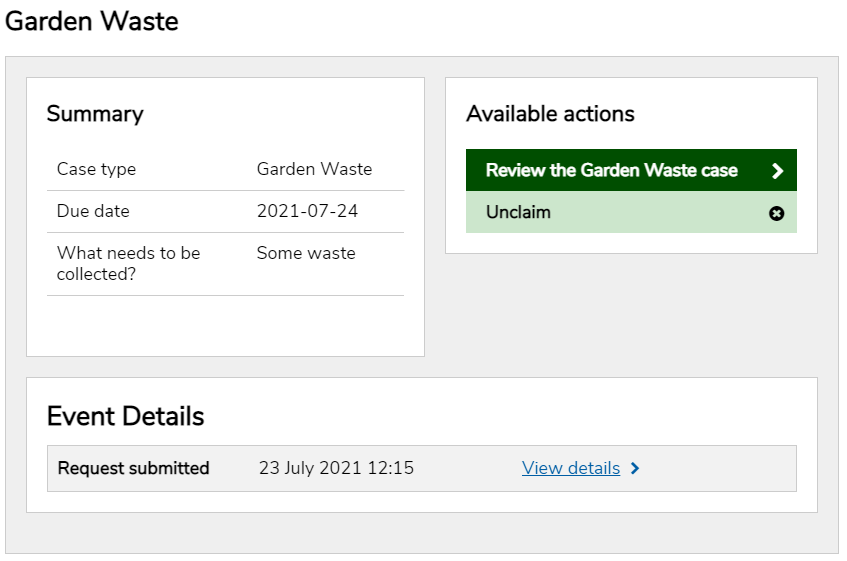
A summary and a log of events are displayed to users when they click on a card in the User Requests template or from the process descriptions in the Self Service template.
Summary Events
Summary events are a special type of history event that can be added to a history by the start and complete workflow action form fields.
Summary events compile a copy of all of the form data that has been submitted so far in the process. These values are used by the User Requests and Self Service templates to display the "Summary Details" section in the screenshot above. New summaries are written as a workflow progresses and the templates show the most recent one.
There's a more technical look at history events and summaries in the History Events and Summary Events article in the history worker documentation.
Displaying History Data in Self Service and User Requests
Summaries are displayed using a read-only form. The name of the form to use is stored in the event. The read-only form will display data using the fields on the form, or a "custom read-only" template written using Handlebars in the form settings.
Take a look at the Read-Only Forms article form more information.
Event Lists and Details
Beneath the summary, both Self Service and User Requests can display a list of the events that took place during the history of a process.
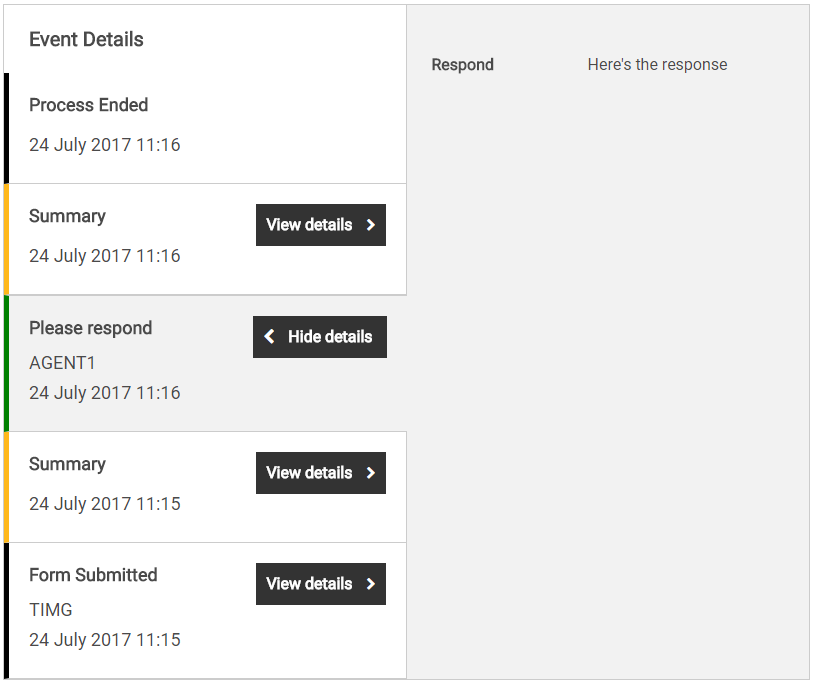
In this example you can see (from bottom to top):
- The event written when the form was submitted. The title of this event is set in the Workflow Start action field's "Event description" property
- The summary event generated by the workflow engine when the form was submitted
- The event written when AGENT1 completed the user task. The title of this event is the name of the user task in the workflow model
- The details of user task (on the right). This is displayed using the form that created the event. This can be changed in exactly the same way as the main self service summary described above, by picking a different form in the "Form Name" property of the Workflow Complete Task action field of the form that generated this event
- The summary event generated by the workflow engine when the task form was submitted
- The end event generated by the workflow engine. This will either be be "Process Ended", or can be set using the
_finalHistoryDescription process variable
All of our events have "View details" buttons because all of our user actions have been set to store form data with them. Summary events do this automatically, standard history events need to be told to store form data in the various form action fields.
Hiding the Summaries
In the article configuration (the article extras) for Self Service and User Requests, you can choose whether or not summary events are shown in the event list. We generally recommend not showing them because, if your history events are storing form data, the summaries will duplicate a lot of the standard events in the list.


