1. Overview
Before attempting this tutorial you should be familiar with using the forms designer, publishing forms, and relating forms to articles so that they appear on your website.
What you'll learn
This tutorial introduces the script editor. The script editor can be used to create dynamic and conditional behaviour in your forms. You'll learn how to show and hide form fields based on the value of another field. The example uses checkboxes, but the same logic can be used with many other fields.
What you'll build
A form with a question and three checkboxes for answers. Extra fields will be displayed when the checkboxes are selected. See Showing and Hiding Fields Example for the finished form.
What you'll need
- A browser with access to iCM
- iCM user permissions to add, edit and publish forms
- iCM user permissions to add edit and publish articles
- An area of your site, or development site, where you can safely publish test content
2. Setup
This example builds on the form created in the Creating your First Form tutorial. If you have it, open your form from that tutorial and move on to step 3.
Download a starting form
If you skipped the first tutorial you can download and import the starting form instead: Show Hide Start Form (ZIP, 2 KB)
Importing the example
If you don't already have a form, import the form in the zip file above. Download the file, then unzip it. It contains a single form called form_CODELABSHOWHIDEFIELD.
Right click on a form group, choose "Import forms into group", then "Save as Work in Progress".
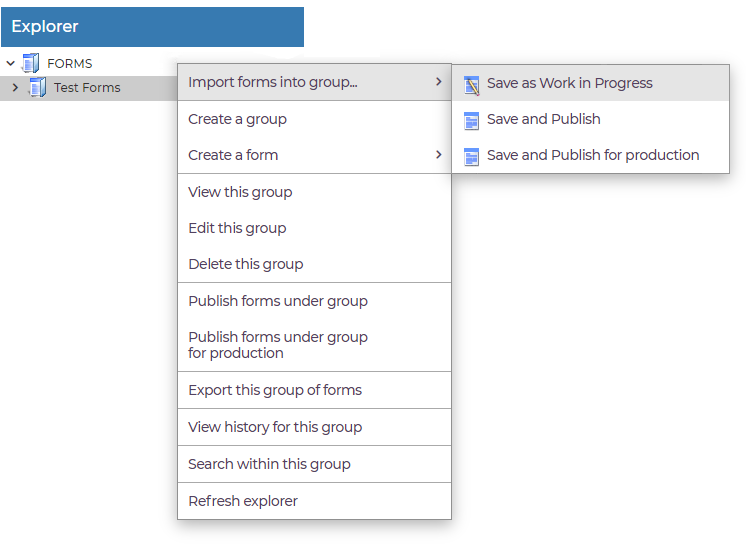
Next, choose the form you'd like to import, then "Continue this import" from the left-hand action menu. You can work on your form by double-clicking on it.
There's a more detailed look at importing forms in the Importing Forms documentation.
3. Hiding the fields
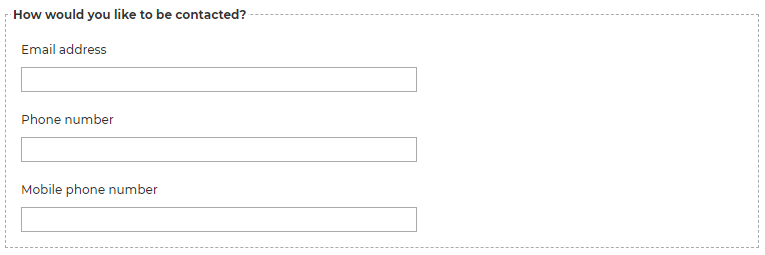
You should now have a form with three input fields which looks like this:
Hiding fields using the initialisation handler
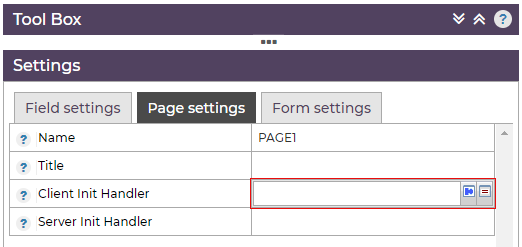
When the form is first displayed, we want to hide the fields for contact details until the user picks how they'd like to be contacted. To do this, first find the "Client Init Handler" in the "Page Settings" tab:
Then open the script editor:
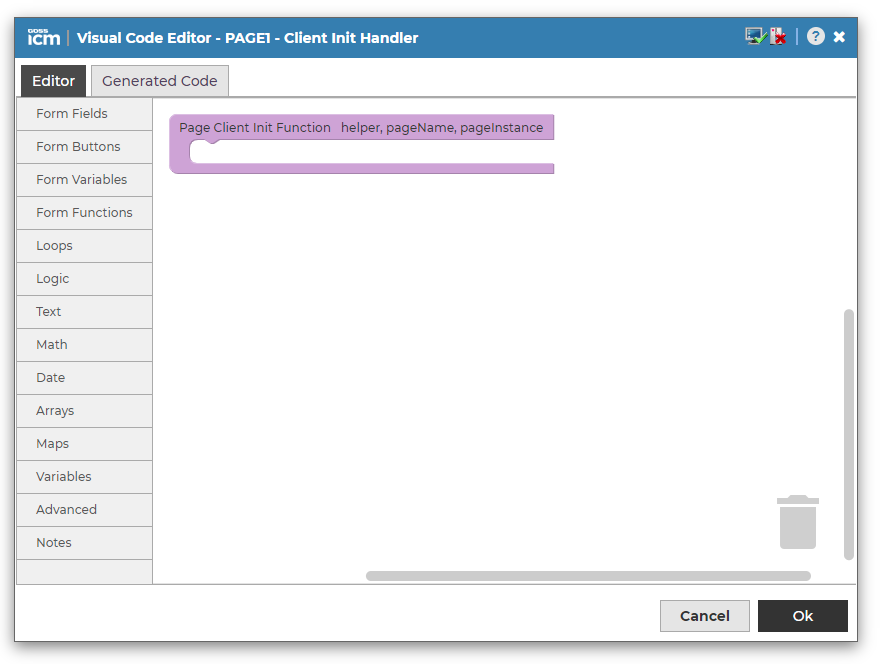
You can write the script by adding blocks to it. In the "Form Fields" category, there's a block called "hide field..."
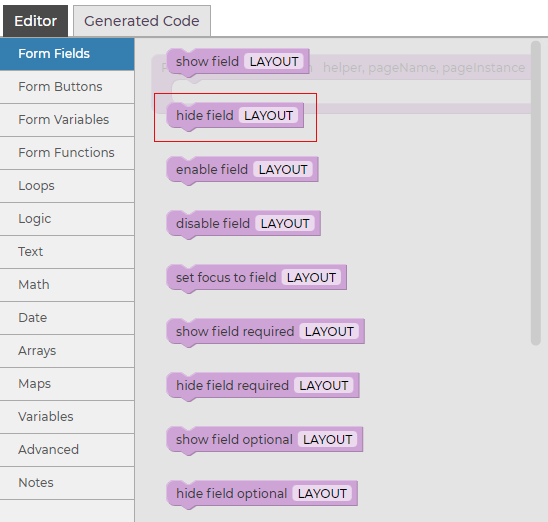
Drag the field into the work area and add it to the function block. The block will snap into place when you drop it:

The text "LAYOUT" is the name of the field that will be hidden. Click on the text to display a list of all of the fields in your form. Pick the field you'd like to hide:
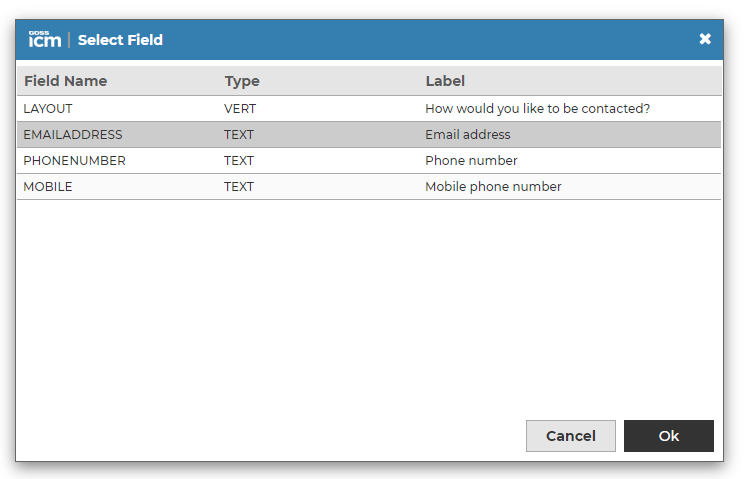
Add two more blocks and update the field that will be hidden by each one:

Now when your form is displayed, all three fields will be hidden. If your form is already published on your site you can try this out now by saving and publishing your changes.
4. Adding checkboxes
Next add checkboxes to your form. When these are checked they will reveal the hidden input fields.
Add the fields
From the Tool Box, drag a checkbox field onto your form:
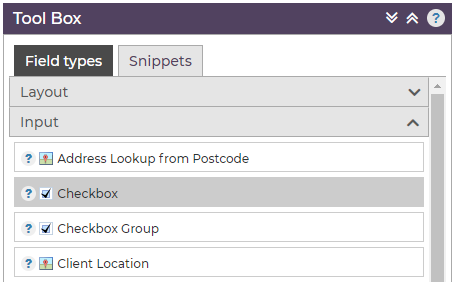
Place the first one above the email address field:

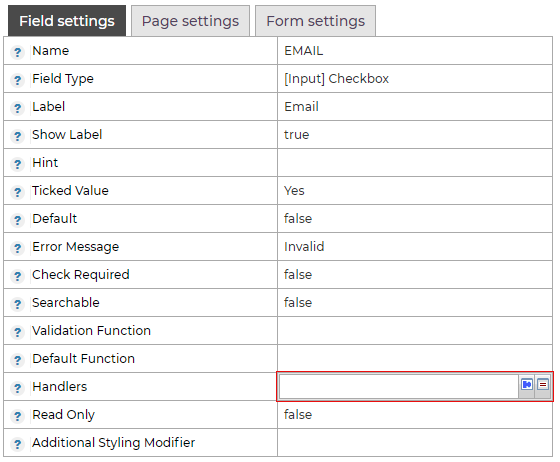
Update the checkbox field so it has the name EMAIL and label Email. Note how the default "Ticked Value" of the field is "Yes" (we'll be using that in the next step):
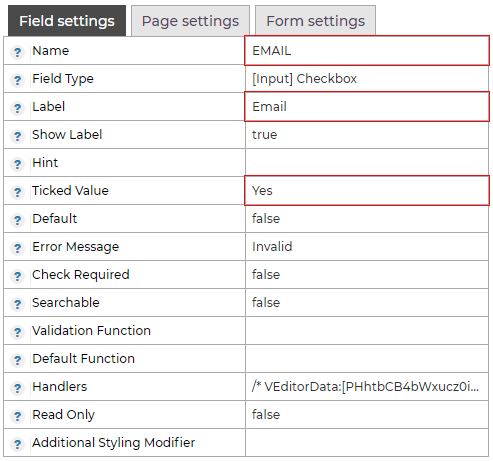
Add two more checkbox fields for phone and text message. Remember to update the names and labels:
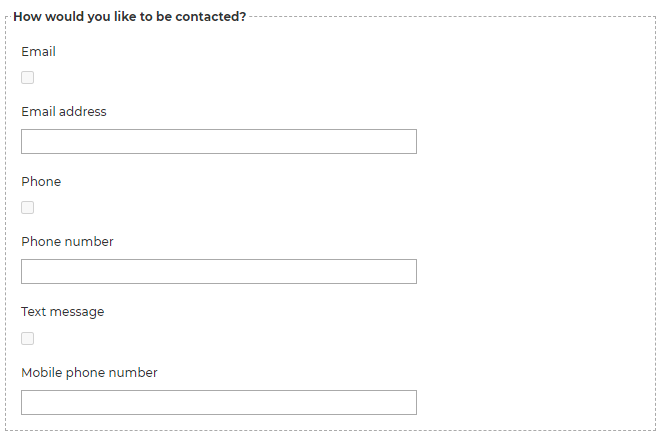
Save and publish your form to see the new checkbox fields on your site. At the moment they won't do anything when they are checked.
5. Add logic to the checkboxes
Most form fields have a property called Handlers. A handler contains a script that is triggered when the value of the field changes. The script you write provides the instructions for what you'd like to happen.
Add a handler to the first checkbox
The handler of each checkbox field needs to do two things. First it needs to show one of the hidden fields when the checkbox is checked. Second it needs to hide the field and clear the value when unchecked.
Click on the email checkbox, then the Handler property:
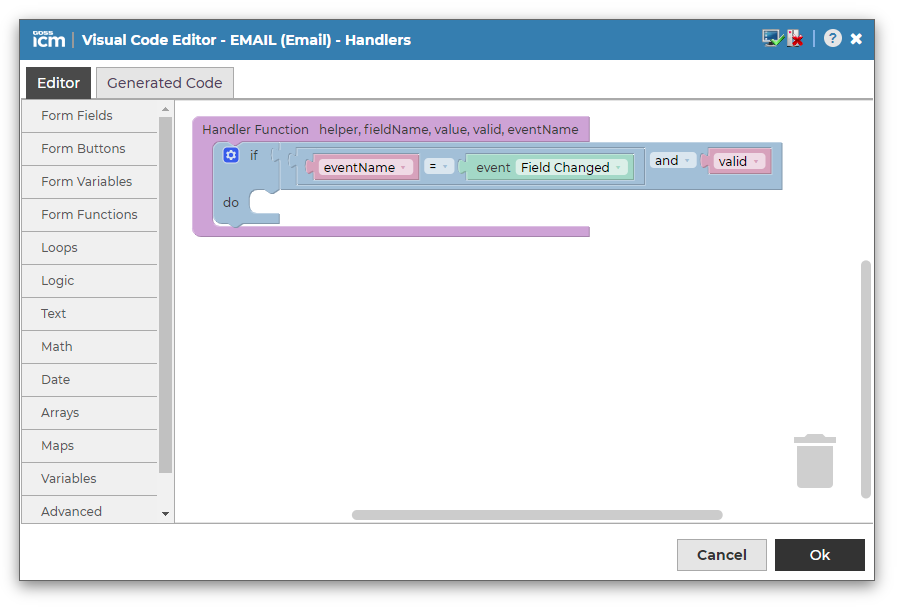
Open the script editor, it already contains the starting point for your script:
In the "Logic" category, there's a block for building "if/else" statements:
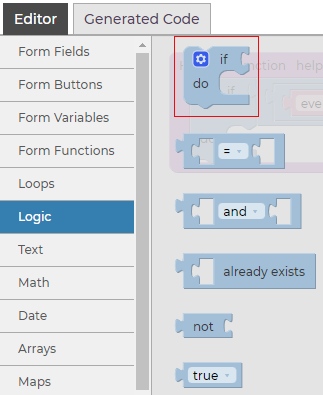
Drag the block into the work area and add it to the function. The block will snap into place when you drop it:

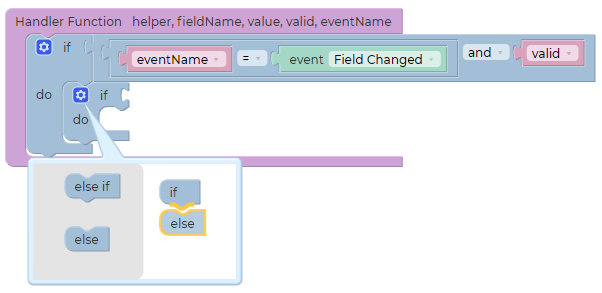
Click on the gear icon. This will let you build up the if/else statement. Drag the "else" block from the left and attach it to the "if" block on the right:
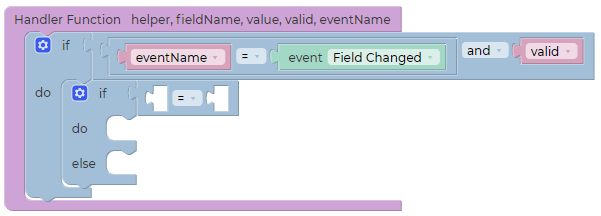
The logic we want to write states "if the value of this field equals 'Yes', show a field, otherwise, hide a field and clear its value". To build the first part of that logic, add an "equals" block from the "Logic" category:
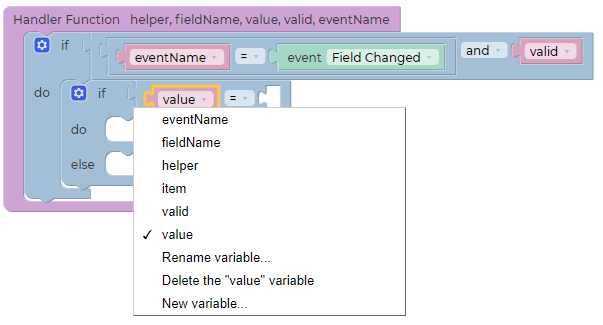
Next, in the "Variables" category, add a "variable" block to the first part of the "equals" block. Variables are named containers that your form knows about - they hold values which may change (they vary) while your form is being filled out.
Click on the text to pick a variable. The "value" variable holds the current value of this checkbox field:
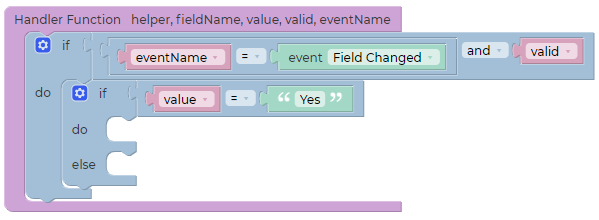
The value of the checkbox field will be either "Yes" (see the previous step in this tutorial) or it will be empty. Add a "text" block and update the text to "Yes":
Add "show field..." and "hide field..." blocks. Update the name of the field that will be shown or hidden by clicking on the text:
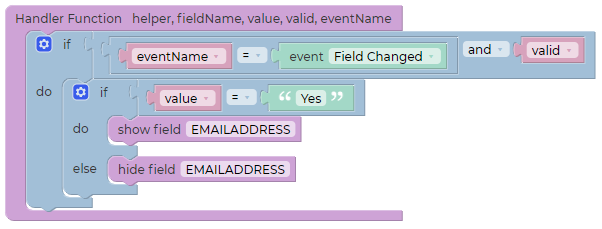
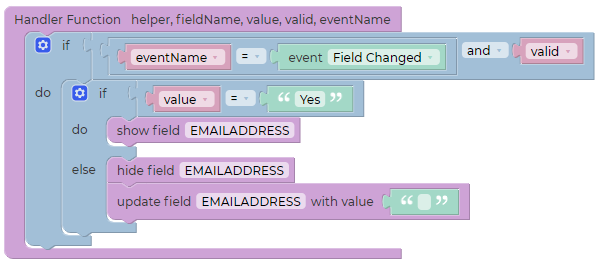
The final step is to clear the value of the field if the user hides it by unchecking the box. This step is important because if a user changes their mind, you don't want to collect any text entered into a field which is later hidden.
From the "Form Fields" category, add the "update field..." block. Pick the name of the field that will be updated, then add an empty text block to clear the value:
Repeat for the remaining fields
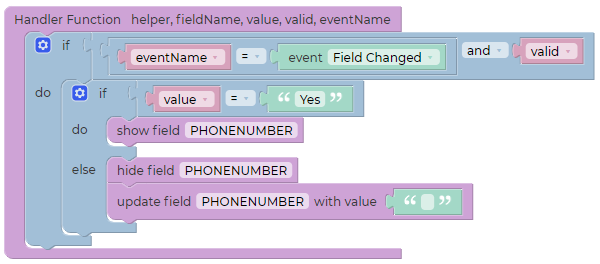
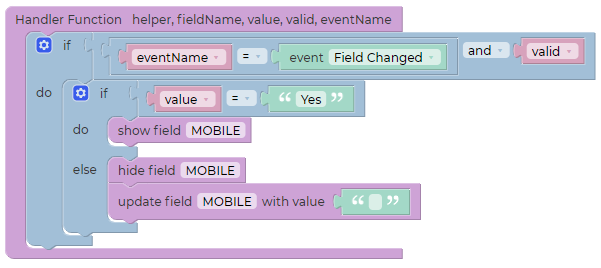
Add the same logic to the other checkboxes, making sure the relevant fields are shown and hidden for each one.
Save and publish
Save and publish your form on your site. When you check each checkbox a new field should be revealed. Clearing a checkbox should hide the text field and clear anything that had been typed into it.
Something's gone wrong
If something isn't working you can download and import the finished example: Show Hide Finished Form (ZIP, 5 KB)
The finished form is published here: Showing and Hiding Fields Example
6. Congratulations!
You have now built a form that shows and hides fields. In this tutorial you learnt:
- How to use the script editor to create dynamic forms
- How to use a form's page "Init handler" to manipulate fields as soon the page loads
- How to use the handler of one field to make changes to another field
- How to use if/else statements to build logic into your forms
- How variables hold values that can be used in your form
Further reading
The following pages provide more information about forms and the forms designer.
- Form Fields - Information and examples for all of the fields you can use in your forms
- JavaScript Editors - An overview of the script editors
- Blockly Blocks - A description of the custom blocks you can use to build scripts
- Form Helper Functions - For users comfortable writing JavaScript there are over 150 different functions you can use when building forms


