1. Overview
Before starting this tutorial you should be familiar with using the forms designer and building multipage forms.
The tutorial uses the form built in Multipage Forms and Navigation as a starting point.
What you'll learn
By the end of this tutorial you will be able to place a decision point in a form that leads the person completing it down one of two branches.
You'll learn how to set up navigation through a multipage form and how to clear the values entered into optional pages if a user changes their mind and backtracks to the start of the form.
What you'll build
A form with five pages - the user only completes four of them. Page two asks a question. If the user answers "yes" they see one page, if they answer "no" they see a different page. The final page and all of the navigation buttons behave logically based on the path the user took.
Branching Form Example shows the finished version.
What you'll need
- A browser with access to iCM
- iCM user permissions to add, edit and publish forms
- iCM user permissions to add edit and publish articles
- An area of your site, or development site, where you can safely publish test content
2. Setup
If you've already completed the Multipage Forms and Navigation tutorial, you can use that form as the starting point.
Your form should have the following pages:

Download
If you don't have a suitable form, download and import Multipage Finished Form (ZIP, 4 KB).
If you need to recap importing forms, see the Showing and Hiding Form Fields Setup Instructions.
3. Create a decision point
This example is slightly artificial, but demonstrates all of the key things to consider in branching forms.
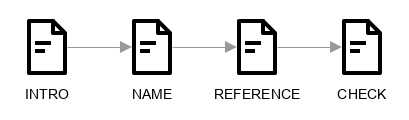
The flow of the original form is:
We're going to add a new page which will determine the page that is shown next:
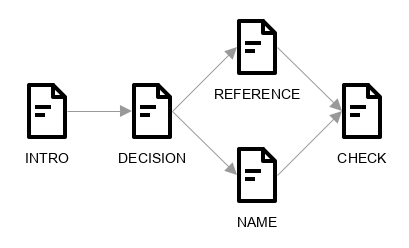
Branching forms look at the value of a field on a page (eg the answer to a question) then show different pages depending on the answer. This is a great way to skip over pages that might be irrelevant, or display additional pages to gather further information. You could even use branching early in your form to take someone to a final page letting them know they don't need to complete it.
Add a new page
Add a new page in position two in your form.

Name the page DECISION. Remember you can reorder pages by dragging and dropping the page tab.
Add fields
Add the following fields to your new page.
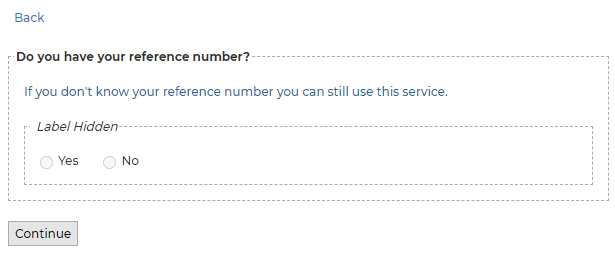
- Navigation button back link - Place a navigation button at the top of the page. Change the mode to back link and label to "Back". This link will always take the user back to page 1
- Vertical layout - Add a layout field to hold the other fields
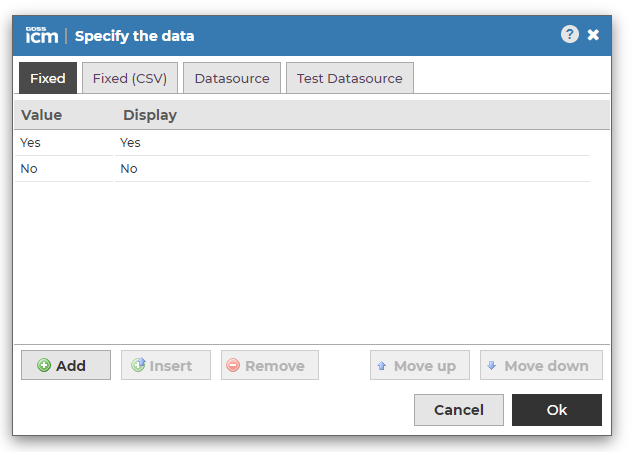
- Radio button group - The value picked in this field will determine which page the user sees next. Call the field DOYOUHAVEREFERENCE. Set the options as Yes and No
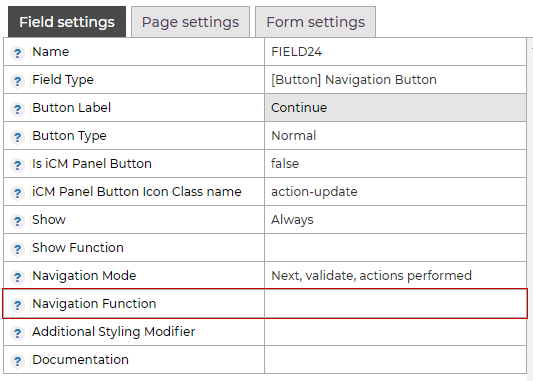
- Navigation button - Give it the label "Continue". We'll look at the navigation function in the next step
4. Add logic to the continue buttons
Navigation buttons control which page a user sees when they are pressed. Their default behaviour navigates forwards (left to right) or back (right to left) through the pages of your form as they are laid out in the forms designer.
You can jump to a different page using a button's Navigation Function.
Decision page
The navigation button on the decision page needs to check the value of the radio group field, then set the next page appropriately.
Start by creating the following function (there was an introduction to the script editor in the Using the Script Editor tutorial):
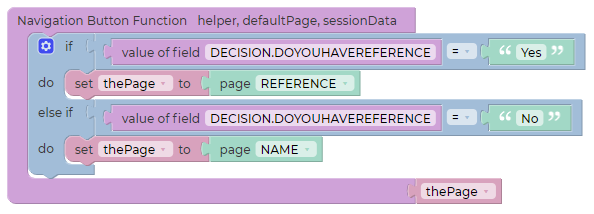
The example above means if someone answers Yes, they'll be taken to a page to enter their reference number, if they answer No they'll be taken to a page to enter their name. The "value of field" block is the radio group, and "Yes/No" are the two radio button options.
The function also needs to clear data from optional pages should the person filling out the form change their mind. This needs to happen because someone might go through the form, entering all of their details, then go backwards though the form, change their answer to the question on the decision page, then go down the other branch. Without clearing the values you could end up with two sets of answers.
You can remove all of the data from a page that has already been visited using the "remove data" form function block.
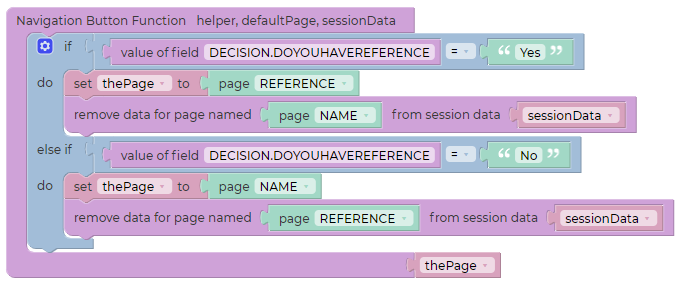
Now, when someone navigates down one branch, any data already entered into the other branch will be removed.
Name page
The navigation button on page 3 (in the forms designer) also needs a function. The default behaviour would navigate to page 4, but we need the button to skip a page and go to the final page of the form.

Reference number page
The navigation button on this page doesn't need a function. From here the final page of the form is the default as it appears next in the forms designer.
5. Add logic to the back buttons
Just like the continue buttons, the back links also need to be able to skip over pages.
Decision page
The back link on this page doesn't need a function, it will always take the user back to the first page.
Name page
This back link doesn't need a function to set the page - the page to the left of it in the forms designer is the one we want users to go back to.
Reference number page
The bank link on this page needs to skip over the name page and go back to the decision page. If it didn't the user would go "back" to the page asking for their name (because it's to the left of the current page in the forms designer), even though they didn't come from there.

Check page
When someone arrives at the final page they could have come via either the name page, or the reference number page. The back link needs some logic so they are sent back to the right place.
This works in exactly the same way as the continue button at the start of the branching section. The function looks up what the user picked in the radio button group and directs them back to the appropriate page:
6. Create a summary
The summary created in the Multipage Forms and Navigation tutorial displayed the values entered into all of the fields of the form.
Because this form now has optional pages, the summary needs to be changed so it only displays fields if they had something entered into them.
HTML template
Using the same HTML template field as the previous tutorial, this time create a "non-blank summary" for all pages:
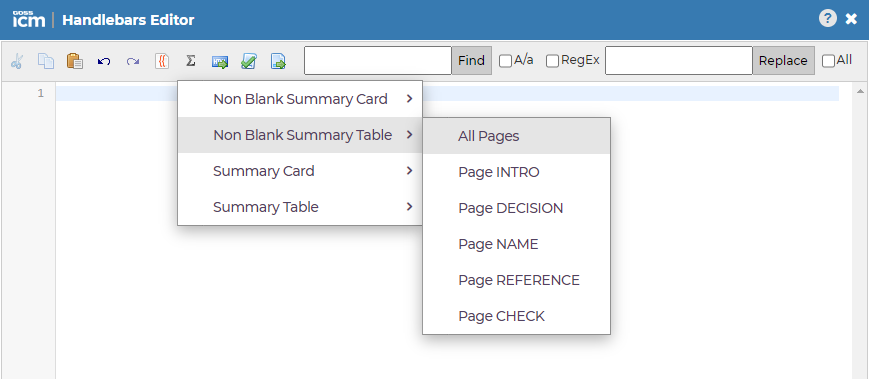
This will generate a template that includes all of the form fields wrapped in Handlebars
You can edit the template to exclude elements or add additional text.
In a later tutorial we'll look more closely at this field and add edit buttons so a user can jump back to a page to edit their answers.
7. Congratulations!
You've now built a branching multipage form you can publish on your site. It should behave like the Branching Form Example
In this exercise you learnt:
- How to use navigation functions to set which page comes next
- The importance of clearing page data in optional pages
- How to create a summary of a form on the final page
Further reading
These pages cover some of the more advanced elements this tutorial introduced:
Share this page


