1. Overview
Before attempting this tutorial you should be familiar with using the forms designer, publishing forms, and relating forms to articles so that they appear on your website.
What you'll learn
Previous tutorials created single page forms. In this tutorial you'll learn how to add pages to a form and use buttons to navigate between them.
What you'll build
You'll create a form with four pages, add buttons so a user can navigate back and forwards between pages, and create a summary on the final page (a later tutorial will develop this summary into a full "check your answers" page). In this example there is only a single path through the form, there aren't any optional pages. The Multipage Forms and Branching example develops this form with optional pages.
See Multipage Form Example for the finished form.
What you'll need
- A browser with access to iCM
- iCM user permissions to add, edit and publish forms
- iCM user permissions to add edit and publish articles
- An area of your site, or development site, where you can safely publish test content
2. Setup
This tutorial doesn't build on a previous form, so you'll need to create a new one.
Right-click on a form group, then choose "Create a form" and "Public Form". Give your form a name and description.
If you aren't familiar with creating forms, try the Creating your First Form tutorial.
3. Add and name pages
When you first open the design area, you'll see a single page called PAGE1.

Add new pages
To add new pages, press the + tab.

For this tutorial, create a total of four pages.
Name your pages
To make pages easier to work with, we recommend naming them.
Open the Page Settings section of the right-hand Settings Panel. This list of settings is unique for each page. The first setting is the page name.
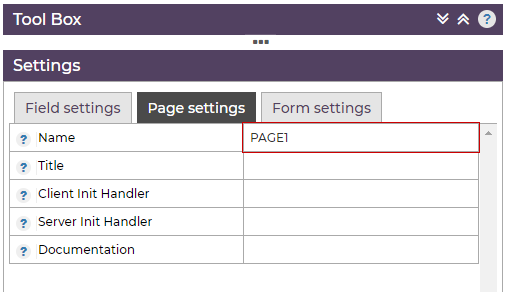
Page names must begin with a letter and can only contain letters and numbers.
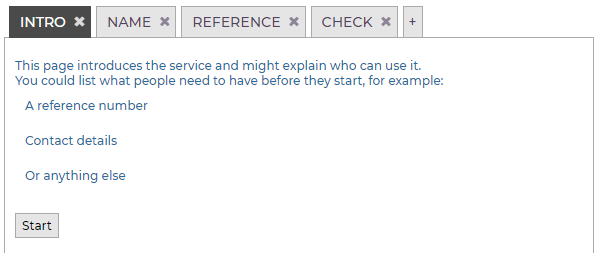
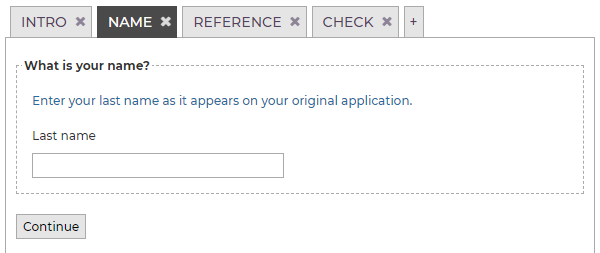
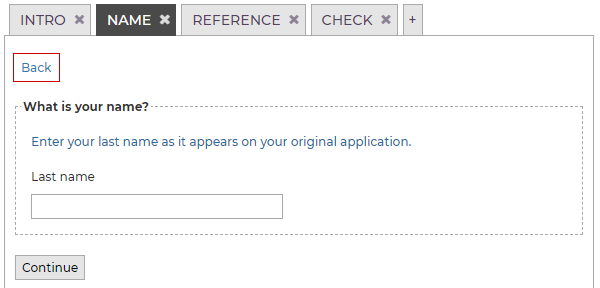
Name your pages INTRO, NAME, REFERENCE, CHECK.

Did you know?
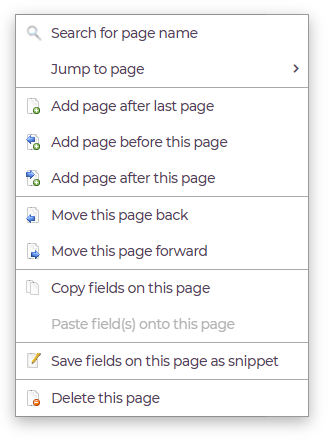
If you right-click anywhere on a page, there's a menu with options to add pages, change the order of pages, or quickly jump to any page on your form.
4. Add fields to your form
Using the drag and drop fields from the toolbox, add the following to each page of your form. We'll add navigation buttons later.
You don't have to precisely copy the examples below, the important thing is to have some fields on your form, ready for the next steps. Remember to give your input fields meaningful names.
Page 1 - INTRO
You should clearly explain what a form is about before someone starts to fill it out. On websites like GOV.UK you'll see information about a form and a "Start now" button.
You can replicate that style using the guidance text field.

Enter some text explaining what your form is about. You can also include HTML.
Page 2 - NAME
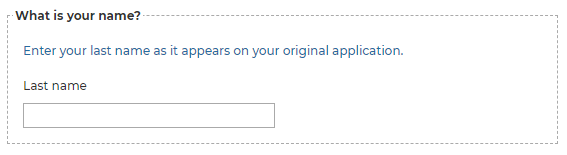
Add a layout field and a text input field. The label of the layout field can be used to ask a question.
Give the text field a name and label. The example uses LASTNAME.
Guidance text fields can add further help.
Page 3 - REFERENCE
This page is similar to the previous page. Add a layout field and another input box. This input is called REFERENCENUMBER.

Page 4 - CHECK
We'll create the final page later in the tutorial.
5. Add navigation
Now that you have a form with four pages it's time to add buttons so users can navigate backwards and forwards through it.
Navigation buttons
The navigation button can be used to jump to any page on your form. It can also be set up as a "back link" rather than a button.
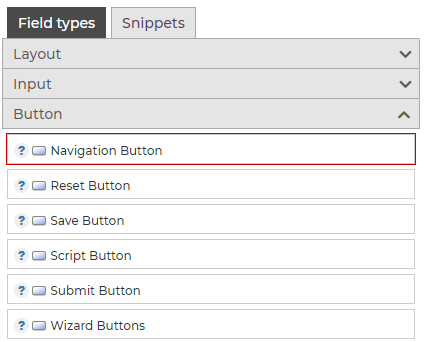
Going forwards
The default behaviour of the button is to go forwards to the next page.
Add buttons to the bottom of the first three pages of your form (not the last page). Update the button label, in the field settings, to something more meaningful. The example at the end of this tutorial uses "Start" on the first page of the form and "Continue" on the other pages.
Going backwards
Next add buttons to the top of each page, apart from the first page. These buttons are going to let users navigate backwards through your form.
In the field settings, change the navigation mode to "Back, no validation (link)"

This means that when someone navigates back from this page, none of the values will be saved and none of the fields will be validated.
Don't forget to change the field label to "Back".
6. Create a summary on the final page
On the final page of a form it's a good idea to display a summary of the fields that have been filled out.
HTML template
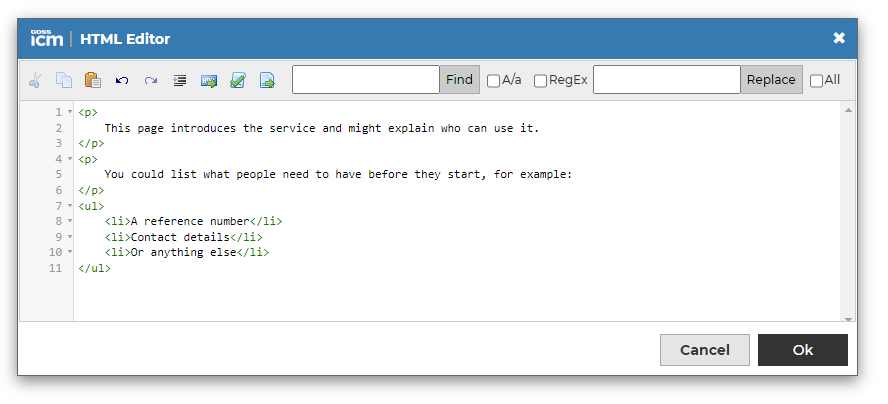
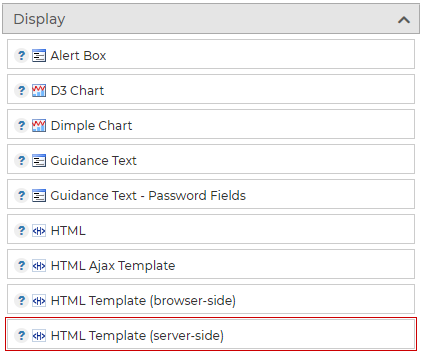
There are two versions of the HTML template field. For this example, add the server-side one to your form.
Edit the field's Template setting, and from the toolbar, pick the All Pages version of the Summary Table.
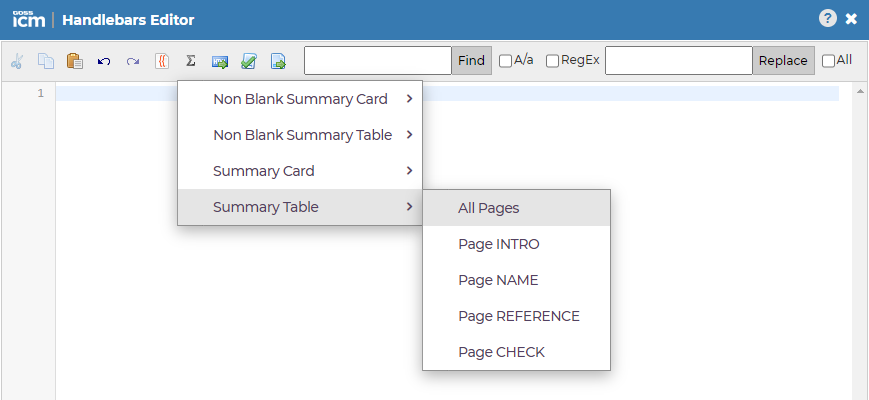
This will generate a template that will display all of the values entered into your form in a table. You can edit the template to exclude elements or add in additional text.
In a later tutorial we'll look more closely at this field and add edit buttons so a user can jump back to a page to edit their answers.
7. Congratulations!
You've now built a simple multipage form that you can publish on your site. It should behave like the Multipage Form Example.
In this tutorial you learnt:
- How to add new pages to a form
- How buttons navigate through a form
- That navigation buttons can be used as "back links"
- How to change button labels
- Some best practice approaches for what to include on the first and last pages of multipage forms
Further reading
These pages have more information about the forms designer and fields used in this tutorial:
- The Design Area
- Navigation Button
- HTML Template (server-side)
- GOV.UK has useful guidance about Form Structure (opens new window) which is relevant to all forms, not just those used by public bodies
You will also want to add a submit button and actions to your form's final page. The email and confirmation action fields were used in the Creating your First Form tutorial.
Share this page


