This article introduces the Forms Designer, the components that make up a form, and how to publish a form on your website.
If you prefer, there's a step by step Creating your First Form tutorial that will guide you through the information below.
Creating a Form
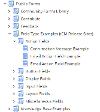
Like most content in iCM, forms are organised into groups. Here are some of the groups used on this site.

Groups are used to secure forms to certain users within iCM. You might like to create a group for each department or team in your organisation, or use groups to organise forms by the different sections of your website. There's more information about groups and security in the Form Groups documentation.
To create a new form, right-click on a group and select "Create a form", then "Public form". You'll then be taken to the first page of the Forms Designer.

Name
Every form has a unique name. Names can only contain letters and numbers and can't include spaces.
Description
The description is displayed in iCM, in the explorer menu, search results, article related content tab and in the process modeller. Make your description meaningful so you can easily identify your form.
Other Properties
Ignore these for now. There's more information in the Creating, Copying and Editing Forms article.
Designing a Form
For detailed descriptions of every part of the Forms Designer, see Using the Forms Designer, otherwise read on for the introduction.
Forms are made up of components, called fields. Fields include text inputs, checkboxes and buttons, as well as more complex things like maps and postcode searches. All of the fields you can add to your form are in the Tool Box on the right hand side of the designer.
Layouts
Most fields have to be placed inside a layout field. Layouts group fields together and set whether they appear vertically, horizontally or inside an accordion.
Add a vertical layout to your form by dragging the field into the design area, then select it to open the field settings.

When you select a field, the Tool Box shows the field settings and all of the field properties you can edit.
Every field has a unique name. They default to FIELD1, FIELD2, FIELD3 etc in the order they are added to your form. We recommend giving fields more meaningful names so they are easier to work with later.
A field's label appears on your form, either above or beside the field. You can change where labels appear in the "Form settings" section of the Tool Box.
On a layout field you can also hide the label, the border, and hint text.
Add a Text Input
The text input field lets someone enter a single line of text, like their name or email address. Drag the text input field onto the design area and place it inside your layout.

Like the layout field, you can set the field's name, change the label and add a hint. With input fields you can also set whether the field is optional or required, a starting value, how many characters can be entered, and add validation and error messages to control what gets entered. We'll discuss all of those properties later in the documentation.
Every field and all of the properties are documented in the Form Fields section. There are also links to the documentation from the

Add a Button
The final field to add is a button. Button's don't need to be placed inside layouts.

Use the Wizard Buttons field type. This set of button "knows" about the pages in your form, so on a single page form automatically gives you a submit button. Forms with Multiple Pages looks at how this button changes when you add more pages to your form.
Publish your Form
You have now designed a one page form with a single text field. It might be simple, but layouts, fields, names and labels are the building blocks you'll use in all of your form designs.
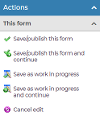
To publish your form select "Save/publish this form" in the left hand actions menu.

Publishing a form is a two-step process. First iCM saves the form and might display a warning. You then need to press "Publish this form" again. All of the actions are described in Publishing Forms .
Next you need to display your form on your website. Create an article using the Forms Service template, then relate your new form to it. When you are designing new forms you can create them on your development or test server, then export them and import them into your public website.
At the moment your form doesn't do anything when it is submitted. The Submitting Forms article looks at how you can handle form submissions, including saving them, sending emails and starting workflows.


