
1. Setup
In this tutorial you'll create a new user and assign them a limited set of privileges to create content.
Before you can start creating iCM users, you'll need a user yourself.
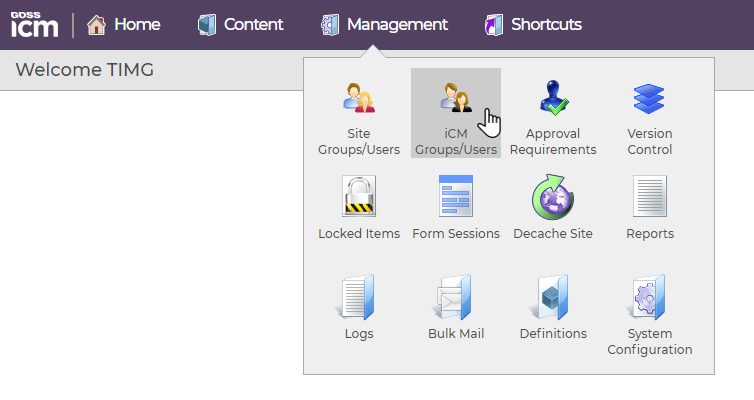
Check that you can access the iCM Groups/Users section in the Management menu:
You'll then be able to access the Groups and Users Explorer menu:
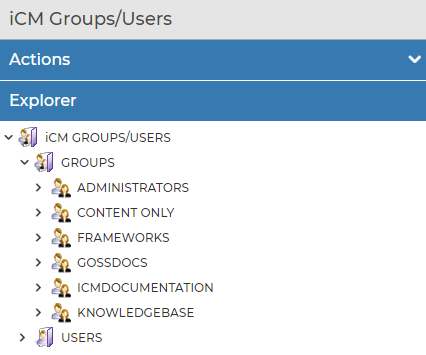
This menu lists all of the groups and users that already exist in iCM.
If you can't access this area of iCM, talk to someone at your organisation who has administrator access and can update your user privileges.
2. Video - Creating a user
Transcript
This is the first in a series of videos about iCM users. It looks at basic users settings and how users are organised.
iCM users are the users who can create content on your platform. That includes articles, media items, forms, end points, and workflow processes, as well as managing other users, and all of the system settings and configuration. Don't confuse them with website users - the people who use your front-end sites.
You can see all of your iCM users in the top Management menu.
Users are organised into groups - which we'll cover groups in a future video.
For now, we're just going to look at individual users.
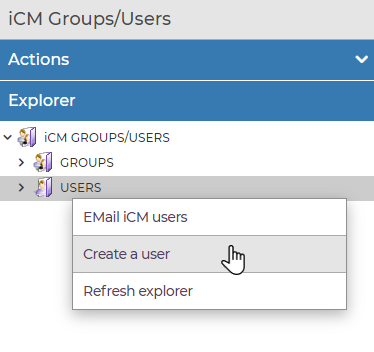
To edit a user, double click on them. To create a new user, right-click on the USERS folder and pick "Create a new user".
All users have a unique username, a password, and an email address.
Password rules are set in the system configuration.
Looking down the other options:
- The iCM administrator checkbox automatically gives the user the ability to edit iCM Groups and users, including their own. iCM insists that at least one user or group is flagged as an administrator so that there's always at least one user able to manage user permissions and you can't lock yourself out of the system
- We can see when the user last logged in and if they are currently logged in
- Then there are a couple of other settings related to passwords
- If a user gets their password wrong 5 times in a row they'll be locked out for an hour and this box will be ticked. You can manually unlock a user by unticking it
- The password reset option lets a user reset a forgotten password by answering their security questions which they would have set when they first log in
Next we've got user preferences. These match the user preferences can be set by the user themselves from the iCM homepage.
Those are the basics of an iCM users, we'll look at groups, privileges and content access in the next video.
3. Task - Create a new user
In this step we're going to create a new user who will have no access to any content at all - we'll give them some access later on.
From the user management section, right-click on the Users folder and choose "Create a user".
Enter a username, password and email address for your new user:
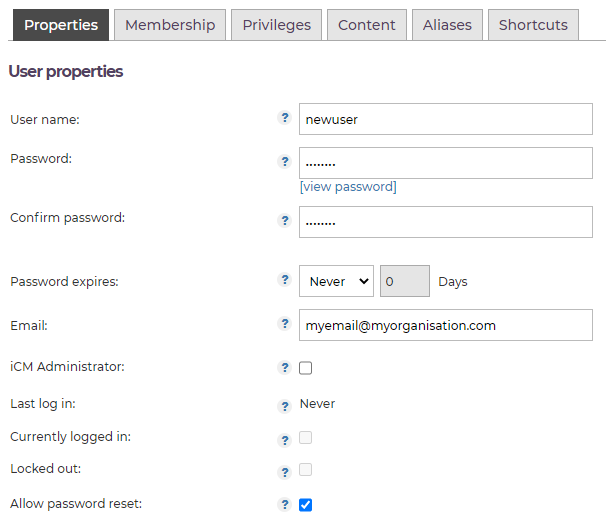
For this example, use your own email address - you'll want to be able to see the emails sent to the user later in these tutorials.
At this stage, don't add the user to any groups, and don't give them any privileges or content roots.
To create the user, press "Save this user" in the left-hand panel.
Switch users
Log out, then try logging in as your new user. You should find that you don't have any items in the top menu apart from the Home icon.
4. Video - Managing user privileges
Transcript
This is the second in a series of videos about iCM users, and looks at the way user privileges and content roots control what an iCM user can see and do.
Almost every part of iCM can be restricted by user privileges, which means you can create a really granular permissions system for your platform.
When you edit an iCM user, the Privileges tab shows the permissions they have.
To add a privilege use the "select button". This menu is organised in the same way as iCM.
I can give the user privileges one at a time by clicking on them. Or if I want the user to have full access to a section, I can double click on the folder to select all.
One thing to note in the article privileges is "publish immediate". Users with this privilege can bypass any approval chins you set up - so only give it to users you want to be able to create content without anyone else checking it.
If privileges control what a user can do, the content roots control where they can do it.
I've given this user access to articles and forms, so in the Content tab, I can control which templates they can use (again, I can double click to select all).
I can also choose which areas they can create content in. These are all of the subsites in this iCM. If I pick a homepage, the user will be able to create content anywhere in that site, or I can just give them access to areas lower down in the article tree.
With forms I can just give them access to certain form groups.
Setting up users individually like this could take a long time. Users can also be put into groups and inherit their permissions from the groups they are in. We'll look at groups in the next video.
5. Task - Update your new user's privileges
In this step we're going give your new user some article editing privileges and content access. Make sure you are logged in as your normal user.
Assign user privileges
Privileges control what a user can do.
Find and edit the new user you created earlier. Open the Privileges tab and give them the "Article Add" and "Article Edit" privileges:
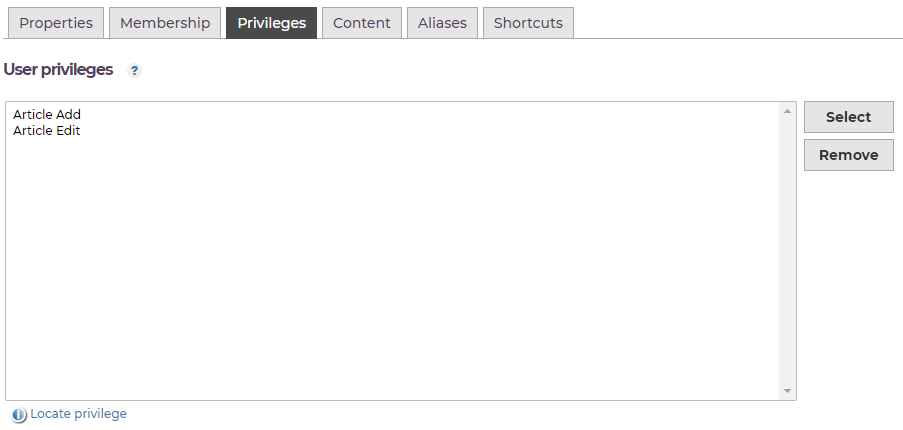
All of the privileges you can assign to users are described in the iCM Privileges documentation.
Add content roots
Content roots control where a user can use their privileges and the content they can access.
On the Content tab give the user access to the Default and List templates:
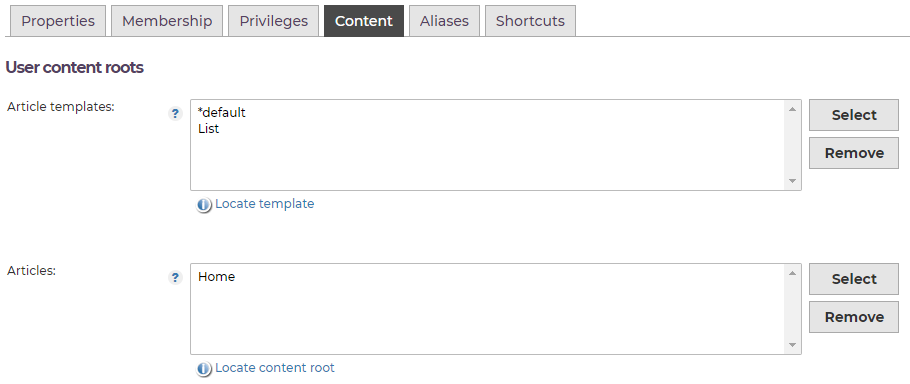
The Articles content root controls where the user will be allowed to create content. If you pick your site homepage, they will be able to edit every article beneath the homepage.
See iCM Content Roots to learn more about how content roots work.
Switch users
Log back in as your new user. You should find you now have the ability to create articles.
Your user won't be able to:
- Move or delete articles
- Import or export articles
- View article history
- Create or edit article friendly URLs or link text
- Edit the headings of existing articles
- Use article inlines, external links, styles, or the HTML view in the article editor
- Add related content (other than other articles)
- Boost or reduce where the article appears in the site search
- Use the WYSIWYG editor
All of these functions are controlled by their own Content Privileges and HTML Editor Privileges, giving you granular control over what your users can see and do.
6. Congratulations!
You've now created a user with the ability to create and edit content in iCM.
We'll use the same user in the next tutorials, adding them to user groups and setting up approval requirements to check the content they create before it's published on your site.
Further reading
These pages provide more information about creating users and how privileges and content roots work:
Up next
Learn how to Create and Manage iCM Groups and assign user permissions based on group membership rather than directly to a user.


