Introduction
The tasks that your case managers can assign to users all start new workflow processes. Sometimes those processes only contain a single task, sometimes they start more complex workflows.
To make writing your own task workflows and integrating them with Case Management easier, we've created a "boilerplate" workflow and form that you can copy and use as a starting point.
Creating custom workflows is an advanced feature of Case Management that requires a good understanding of the process modeller and forms designer. If your task only needs a single form to be completed, use the "multipurpose" task described in Creating Custom Tasks.
General Principles
Most Case Management tasks involve a single workflow user task being assigned to a user, who completes it by filling out information in a single form.
The boilerplate task and workflow let you create more complex Case Management tasks that can include multiple workflow user tasks and workflow elements using a workflow subprocess.
The elements that make up the boilerplate (ie the workflow model, forms and end points) should be copied, renamed, and customised using the information in this document to create your new task and workflow.
The Workflow Model
The boilerplate workflow model is designed to handle the communication between your task and Case Management. When creating a custom task, you should copy the boilerplate model, rename it, and build your workflow in the sub process structure. The first script task will need to be updated with values relevant to your task.
When a case manager generates your task, it will start your copy of the boilerplate workflow. It will assign the first user task to the relevant case manager (or group), before moving on to your custom elements.
End Points
A set of end points is responsible for much of the task functionality. The default end points need to be copied into a new namespace for your new task.
The Form
The boilerplate form is used by the first user task in the workflow. It includes numerous hidden fields and actions which should not be edited. Take a copy of this form, add the fields you need, and add it's name to the workflow model. It's also possible to create fully automated tasks that don't involve users interacting with forms.
Case Configuration
When configuring the tasks that are available in a case, all of the usual configuration options are available, including SLAs, who the task can be assigned to, and whether it is generated automatically when the case starts. It is in this configuration that you enter the name of your custom workflow model that should be started when the task is created.
Before You Start
When creating a copy of the task you'll need to:
- Think of a unique identifier for your task which will be added to the workflow, end point namespace and initial form
- Know which user groups are going to be carrying out your task
Copy the Boilerplate End Points
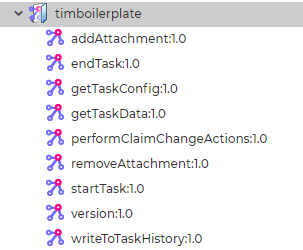
The boilerplate form calls a set of end points, which should be copied and renamed to match your new task.
First create a new end point group at
Find the end points at
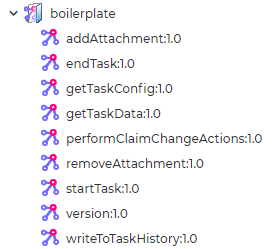
Copy all of the end points in this group into your new group.
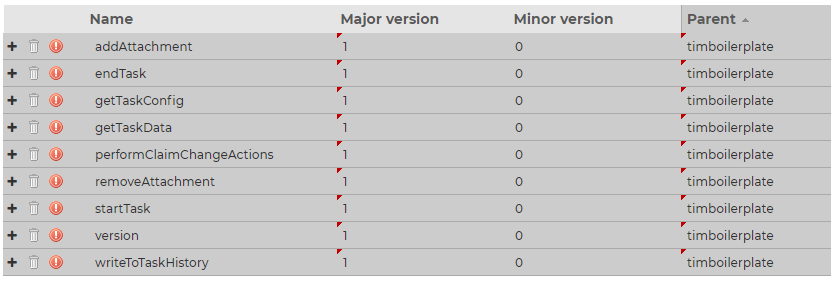
Update the getTaskConfig
Your copy of the
taskType - this must match thetaskTypeId abovetaskName - change this to something meaningful for your tasktitleConf - these titles will appear in the Self Service template when users are claiming tasks
For example:
var response = {
    success: false,
    taskType: "timboilerplate"
};
try {
    var configVars = {
        "taskConf": {
            "taskName": {
                "en": "Tim's Boilerplate Task",
                "cy": "Tasg Enghraifft"
            }
        },
        "titleConf": {
            "timboilerplate": {
                "en": "{{caseTaskSummary}}",
                "cy": "{{caseTaskSummary}}",
            }
        },
        "formConf": {
            "maxFileCountCitizen": 3,
            "maxFileCountStaff": 10,
            "maxFileSizeCitizen": 3000000,
            "maxFileSizeStaff": 5000000,
            "maxFileTextCitizen": "3MB",
            "maxFileTextStaff": "5MB"
        }
    };
    response.vars = configVars;
    response.success = true;
}
Copy the Initial Task Form
The boilerplate workflow includes an initial user task activity. We recommend that this task is built using a copy of the CASEMANAGEMENTTASKBOILERPLATEV1EN form found in the Case Management\v1\Tasks\Boilerplate form group.
Copy the Form
Copy the CASEMANAGEMENTTASKBOILERPLATEV1EN form, rename it and save it in a form group of your own. The name of your form will be added to your copy of the boilerplate workflow as the
Add Your Fields

The form includes an example layout and text input field. Build your form inside this layout.
Actions
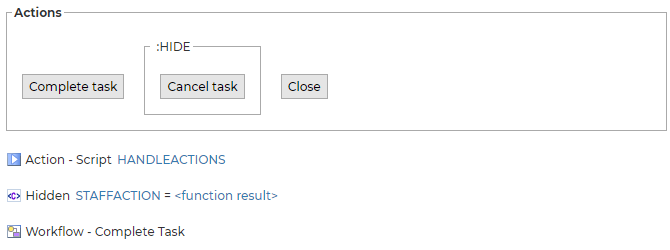
The hidden field STAFFACTION is used by the boilerplate workflow. When the form is submitted or cancelled the value of this hidden field is updated. CANCEL routes the workflow to inform Case Management to cancel the task. CONTINUE will proceed to the sub process.
Page Server-side Initialisation Handler
Open the page-level server init handler.
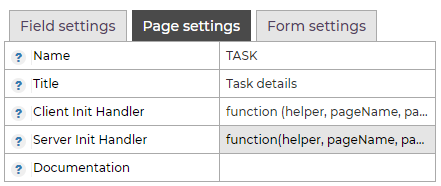
At the top of the script task, replace "boilerplate" with the ID of your new task. This ID should match the final part of the namespace of your end points created in the previous step:
let taskType = "timboilerplate";
Copy the Enquiry View Form
Each task should have an second form to provide a view of the task, accessible from the main case once the task has been generated. The name of this form is added to the case configuration when setting up your task.
Copy The Form
As with the initial form, copy the CASEMANAGEMENTTASKBOILERPLATEENQUIRYVIEWV1EN form.
Page Server-side Initialisation Handler
Open the page-level server init handler.

At the top of the script task, replace "boilerplate" with the ID of your new task, which matches the end point group created earlier:
let taskType = "timboilerplate";
Add Fields
Add the fields you would like to display (ie it should probably include all of the input fields from the initial form).
If your sub process has multiple user tasks your enquiry view form can display data from all of those tasks using the usual process variable to form field name mapping.
Note that is is not a true read-only form. If you want read-only behaviour (ie so your case manager can't update the values submitted by the user tasks) you will have to set individual fields as read only.
Copy the Workflow Model
Copy the workflow model found in the goss\CaseManagement\Tasks\Boilerplate namespace.
In your copy, update the following sections.
Model Properties

You should enter a new:
- Process Identifier - This will need to be added into your case configuration later
- Namespace - For organisation in the modeller
- Name - This is used as the labela in history records
- Description -The description will be displayed to users in the Self Service and User Requests templates. It can contain process variables tokens using the ## notation. See Editing a Model and Self Service and User Requests - Interacting with Workflow Processes for more information
- Candidates - Check that the candidates property includes all of the users groups your task may need to be assigned to
Variables Script Task
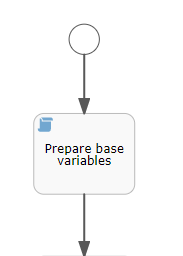
Update the "base variables" script task. This script task holds all of the configuration for your task and includes the following:
| Variable | Type | Description |
|---|---|---|
| taskName | String | The name of your task |
| taskId | String | This must match the task ID and namespace of your end points copied earlier |
| taskHasUserActions | Boolean | Defaults to true. If your task has no user actions, set this variable to false. The workflow follows an alternate path in the event that no user actions (forms) are used throughout the entire model (including your task sub-process), to prevent timing conflicts with the Case Management engine. When the task is configured via Configuration Manager, ensure that it is not set to auto-assign to the case manager if there are no user actions to perform |
| useInitialForm | Boolean | The boilerplate includes a user task before your custom sub process is reached. Set this variable to false to skip this user task. If set to false but you intend to use user actions elsewhere in your sub process, the workflow message activities and script/end point actions should be copied and attached to your first user action - this will allow the claim/unclaim functionality within the engine to work as expected. This variable should also be set to false if taskHasUserActions is set to false |
| taskInitialFormId | String | The name of the form used by your first user task. This will typically be a copy of the boilerplate task form described in the next section of this document |
| taskSelfServiceDescription | String | This will be visible in the Self Service/User Request templates as the name of the task (typically on the button/link used to claim the task) |
| closedStatus | String | Displayed in Case Management (eg case history) when the task is closed |
| cancelledStatus | String | Displayed in Case Management (eg case history) when the task is cancelled |
End Point Activity
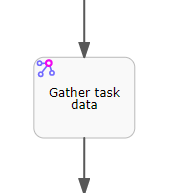
Update this task to call the
Create Your Sub-Process
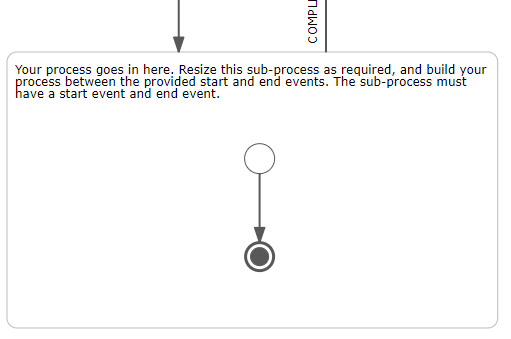
Create your sub process in the structure provided. Your sub process must have start and end events, but otherwise there are no limits to what you can design. It is important that you avoid overwriting any process variables reserved for Case Management without careful consideration. A list of these can be found in the Email Template and Task Title Tokens documentation.
Configuring Your Task
Once you've created your forms and copied the workflow model and end points, you can configure cases to use your new task.
There's a full description of task configuration in the Tasks section.
Create a New task
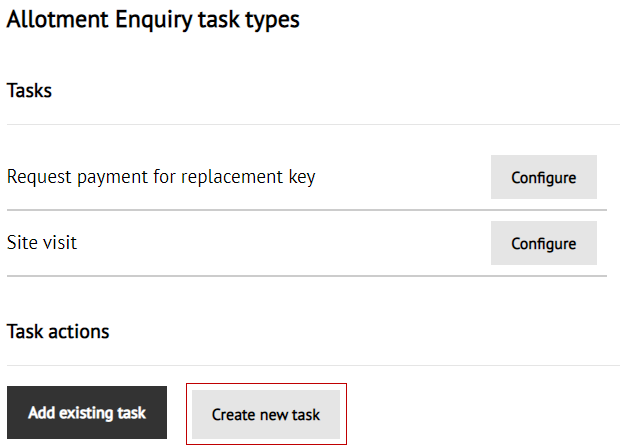
To configure your task, open the tasks section of your case configuration, then pick "Create new task"
On the following pages, enter values for:
- The name of the task as it will appear in Case Management
- Any SLAs
- Whether the task should be assigned directly to the case manager who creates it
- Which groups the task can be assigned to
- Whether the task should be automatically generated each time the associated case is raised
On the final page you will need to enter the names of the workflow process and read-only form created earlier in this tutorial:
- Workflow Process ID - This must match the Process identifier of your copy of the workflow model
- Task Read-only Form ID - The name of your "enquiry view" form
Once the initial task configuration has been created, you'll need to edit it to update the automatically generated task ID..
Press the "Configure" button next to your new task.
In the "Advanced" section, open "Setup/Naming".
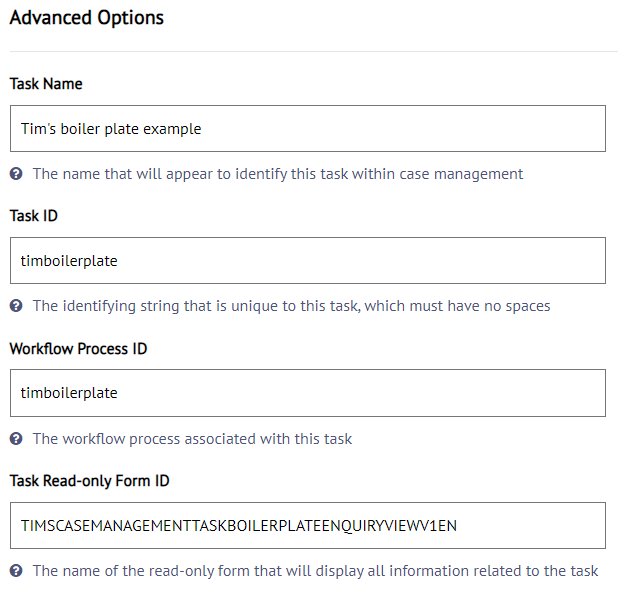
- Task ID - This must match the
taskId in your workflow model's first script task and the namespace your End Points are saved in
Self Service Article Extras
So that users can claim and work on your task, any articles that use the Self Service or User Request templates will need to be updated.
Pick the name of your new task workflow model in the article extras of the articles it should appear on:

Using Your Task
When a case manager creates your task, they will have the usual options (if enabled in the task configuration) to pass attachments, contact information and case details to the task user. See Case Tasks for a full description.
Task Interface
The initial task form created earlier in this guide has the following interface.
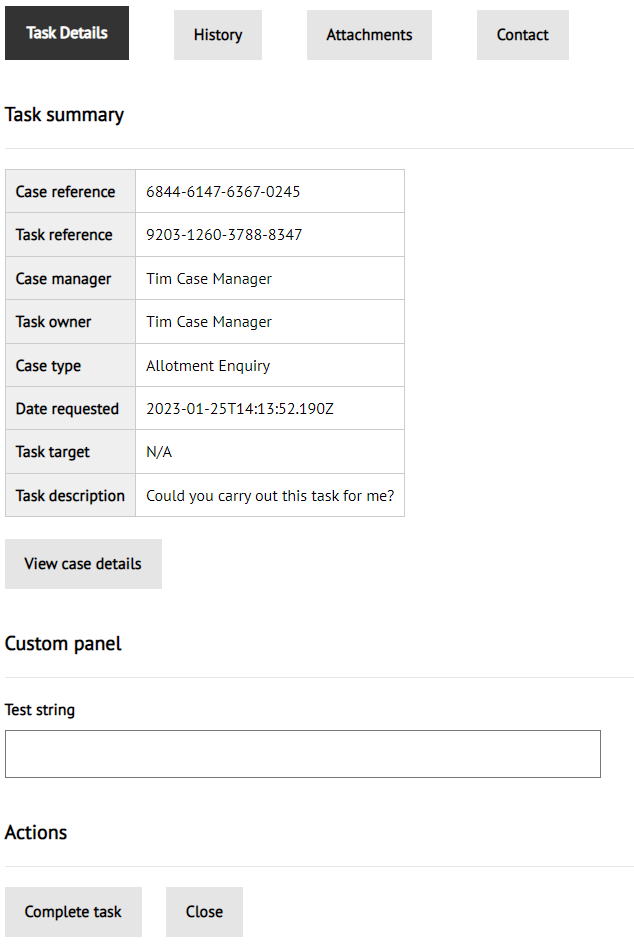
Many of these sections will need to be enabled in your task configuration and may also need the case manager to choose to enable them when they create the task.
Details
The first page displays information about the task and a read only view of the case details.
It also includes the fields added into the layout of the initial form.
History
This tab displays history notes added while working on the task. Notes are also passed back to, and visible in, the main case history, so have a public/private setting. Public notes will be visible to the person who raised the case.
Attachments
This tab will display any attachments the case manager has chosen to pass to the task. Any files uploaded during the task are passed back to the parent case too.
Contact
A read-only view of the contact details of the person who raised the case.


