Introduction
Bookings plugins let you insert additional steps into the booking process. They are most commonly used to collect additional information from the person making the booking.
There are two points where plugins can be added. One before payment, and one after payment.
Plugins are generally forms you design (but can also be complete workflows). The names of your forms are added into the Bookings configuration, and you pick the plugin form you want to use when you schedule your event.
Standard Booking Process
Without plugins enabled the booking process is the same for all events and users.

- Find the event you'd like to book
- Select tickets and enter your name and email address (other options appear here depending on configuration)
- Either "Book now" (for free events) or be redirected to a payment provider (cash payment options also exist)
- Receive a confirmation message and email
Pre-Payment Plugin
Pre-payment plugins add an additional step to the booking process in between selecting tickets and paying.

These plugin forms are used to collect additional information from the person making the booking. Examples include address, the names of attendees, vehicle registration details, dietary requirements or company information.
Examples
You can download some ready to go plugins from the Bookings section of the Community Library.
Design Your Form
This blueprint form (ZIP, 4 KB) will get you started. Download and the zip, then import the blueprint form into your forms designer. Right-click on the blueprint and choose "Create a form using". Give your form a new name and description, and on the Properties tab, change the location where it will be saved. You can read more about blueprints in Form Blueprints, Snippets and Smart Snippets.
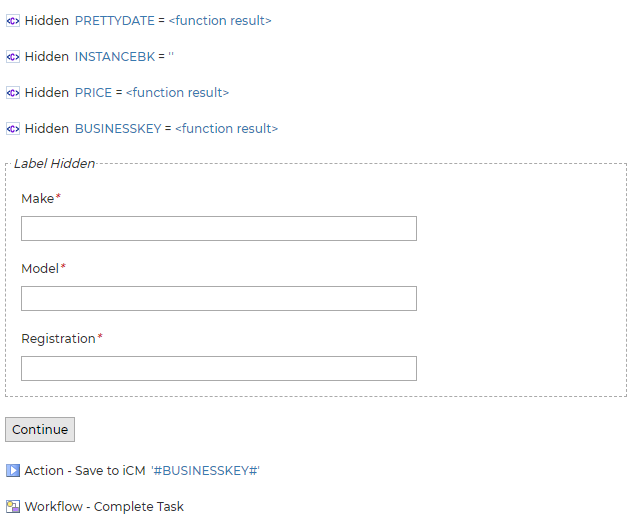
You'll see the form design already has some fields on it. The hidden fields should be left at the top of the first page. The Action - Save to iCM and Workflow - Complete Task fields should be placed at the end of the final page of your form. Other than that, you are free to add whichever fields and as many pages as you need to your form.
This simple one page form collects vehicle details:
Adding Plugins to the Bookings Configuration
The name of your plugin form needs to be added to the plugins section of the Bookings Configuration End Point.
Near the end of the configuration, you'll find a block of code that looks like this:
config.plugins.push({
    "name": "Car details",
    "code": "CarDetails",
    "prePaymentForm": "CARDETAILSFORM",
    "postPaymentWorkflow": "",
    "postPaymentWorkflowVars":  [],
    "bookingManagementForm": "",
    "eventManagementForm": ""
})
| Property | Type | Description |
|---|---|---|
| name | String, required | The name of the plugin. This text will be displayed to the event organiser in a drop-down field as they schedule occurrences |
| code | String, required | The value of this property is not important, but it must be unique for each plugin |
| prePaymentForm | String, optional | The name of the form that should be displayed to the user prior to payment |
| postPaymentWorkflow | String, optional | The name of the workflow that should be started once payment has been taken |
| postPaymentWorkflowVars | Array (of strings), optional | An array of variables names that will be passed from the booking workflow to the postPaymentWorkflow |
| bookingManagementForm | String, optional | The name of the a that should be presented to a user from the booking overview page |
| eventManagementForm | String, optional | The name of the form that should be presented to an event administrator from the event overview page |
This block of code will need to be duplicated for each of your plugins. You can leave values as empty strings if your plugin doesn't use them.
Adding a Plugin to an Event
Once a plugin has been added to the configuration, it can be picked from the event scheduling form:

Plugin Data in the Event Manifest
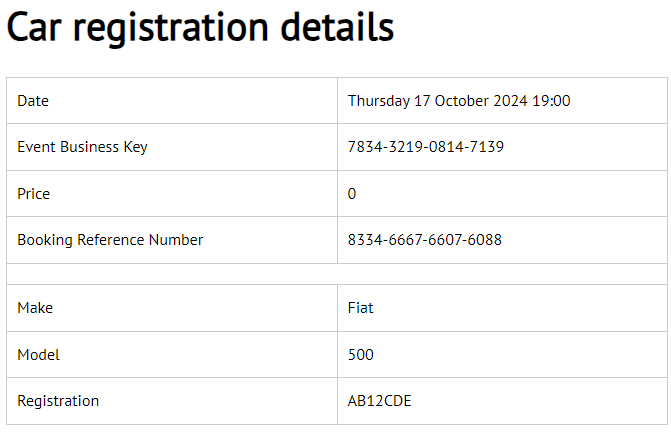
If you build your plugin using the blueprint above, which includes a database save action form field (the object label matches the booking business key), the plugin data is available in the Event Manifest.
The plugin data is visible when you view the details of each booking. It's displayed using the read only view of the plugin form:
All of the plugin data is also available in the manifest CSV.
Post Payment Workflows
It's possible to start another workflow process once a booking has been made. Bookers will be taken straight to the first form in your workflow as soon as they press the "Book Now" button (if the event is free) or once they have been redirected back to your website after a successful payment.
To enable a workflow, enter the process identifier of the workflow you want to start in the plugin configuration (see the configuration section in the previous article). For example
The
- form_DATA - an object containing all of the data needed by the product
- form_EMAIL - the booker's email address
- form_NAME - the booker's name
- form_TEL - the booker's phone number. This field is optional
The business key of the booking is always passed to the new workflow as the value of the
If your plugin has a pre-payment form (described previously) you can include any variables from that in exactly the same way.
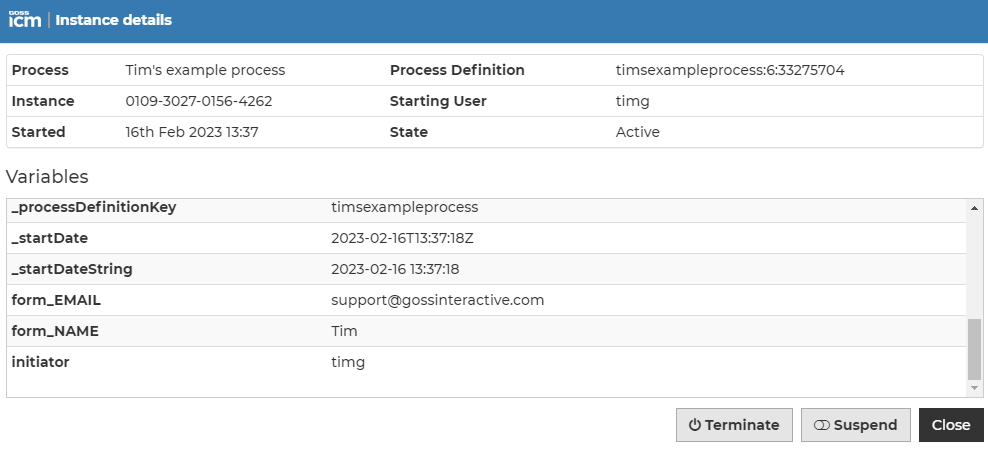
In this example two fields from the booking form are being passed to the new workflow:
        "postPaymentWorkflow": "timsexampleprocess",
        "postPaymentWorkflowVars": ["form_NAME", "form_EMAIL"],
Which resulted in:
Management Forms
Plugin data can be seen and, optionally, updated by bookers and event organisers.
These two features are optional and require slightly more advanced knowledge of how the platform works to implement.
Booking Management Form
Once a user has made their booking, they can track it via the User Requests template - see Self Service and User Requests Integration.
If you want to let users see or update the extra information they submitted via your plugin, you'll need to do the following.
Enter the name of a form as the value of the
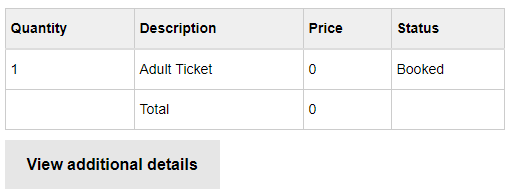
This button will link to your form.
Your management form could use the same form as the pre-payment plugin - this would let users update the information they supplied. Alternatively you could build a read-only version of the form, if details shouldn't be updated. You could use a completely different form, and display values from the original form by including form fields with the same names as those in the original form.
The form must include a submit button and complete task action, which will return to the Booking Details view.
Event Management Form
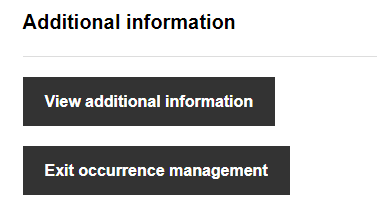
This form is used by event organisers. It enables the "View additional information" button on the first page of the Occurrence Management form when you are Managing Individual Occurrences. The button will appear if there's a value for
Occurrence Details End Point
To retrieve plugin data, your form will need to call the
This end point returns information about the people booked onto an event, including the data entered into your plugin form. The end point has the following parameters:

You must list the variables you want to return. For example:
{
 "variableList": ["form_NAME", "form_REGISTRATION", "form_MAKE", "form_MODEL"],
 "occurrenceBk": "3320-9294-9451-6007"
}
Returns:
"result": {
    "count": 2,
    "list": [{
        "startUserId": "anonymous",
        "startTime": "2020-09-22T10:19:20Z",
        "id": "25916372",
        "businessKey": "8562-7889-1514-4958",
        "processDefinitionName": "Booking v1",
        "processVariables": {
            "form_REGISTRATION": "FG34FGH",
            "form_MAKE": "Nissan",
            "form_MODEL": "Micra",
            "form_NAME": "George"
        },
        "endTime": null,
        "processDefinitionId": "bookingv1:99:25915523"
    }, {
        "startUserId": "anonymous",
        "startTime": "2020-09-22T10:18:43Z",
        "id": "25916177",
        "businessKey": "0405-3793-1256-6724",
        "processDefinitionName": "Booking v1",
        "processVariables": {
            "form_REGISTRATION": "DE12DEF",
            "form_MAKE": "Mini",
            "form_MODEL": "Cooper",
            "form_NAME": "Tom"
        },
        "endTime": null,
        "processDefinitionId": "bookingv1:99:25915523"
    }]
}
Where:
- startUserId - the user who made the booking (anonymous of not logged in)
- startTime - the time the booking was made
- businessKey - the business key of the booking
- processDefinitionName/Id - the name and ID of the booking process
- processVariables - the variables requested (ie the data captured in the plugin form)
Example Form
This example displays the information captured by the plugin form in a table.

The form design includes an HTML template field (to display the data), a submit button (labelled "Close") and a complete task action to return you to the Occurrence Management form.

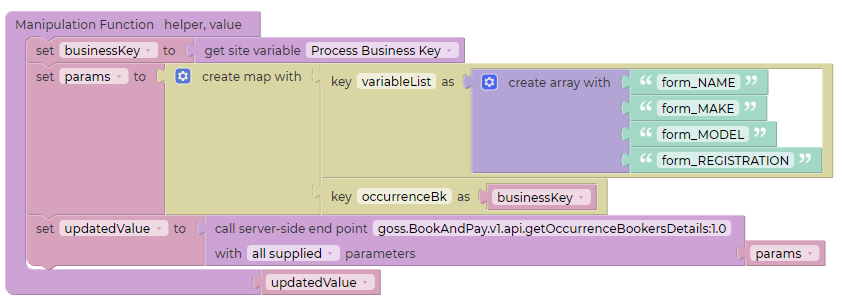
The template field calls the getOccurrenceBookersDetails End Point via the Manipulation Function. Note the use of helper.getSiteVariable('PROCESSBUSINESSKEY'); to get the business key of the event we are managing:
And displays the result using a Handlebars template:
<table style="width:100%">
    <tr>
        <th>Name</th>
        <th>Make</th>
        <th>Model</th>
        <th>Registration</th>
    </tr>
    {{#each list}}
        <tr>
            <td>{{processVariables.form_NAME}}</td>
            <td>{{processVariables.form_MAKE}}</td>
            <td>{{processVariables.form_MODEL}}</td>
            <td>{{processVariables.form_REGISTRATION}}</td>
        </tr>
    {{/each}}
</table>


