Working on a Case
The staff portal is divided into a series of sections. Each one displays enquiry cases at a different stage.
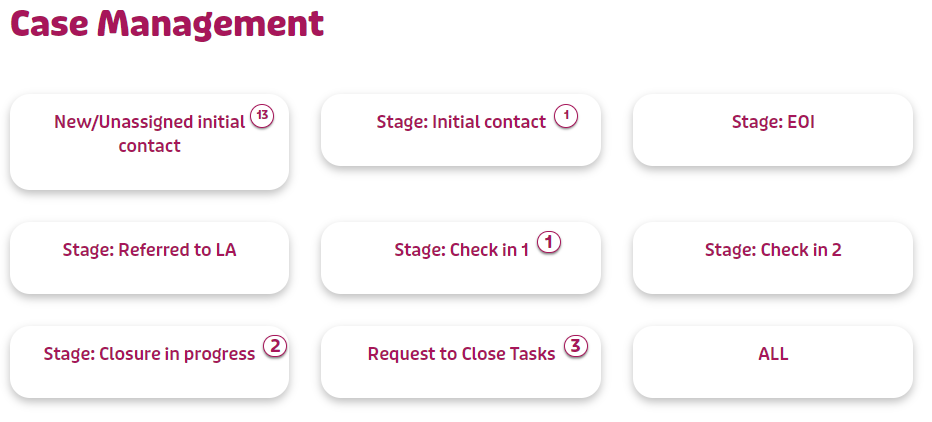
Within each section you'll see lists of fostering enquiries as a series of tasks that need to be completed.
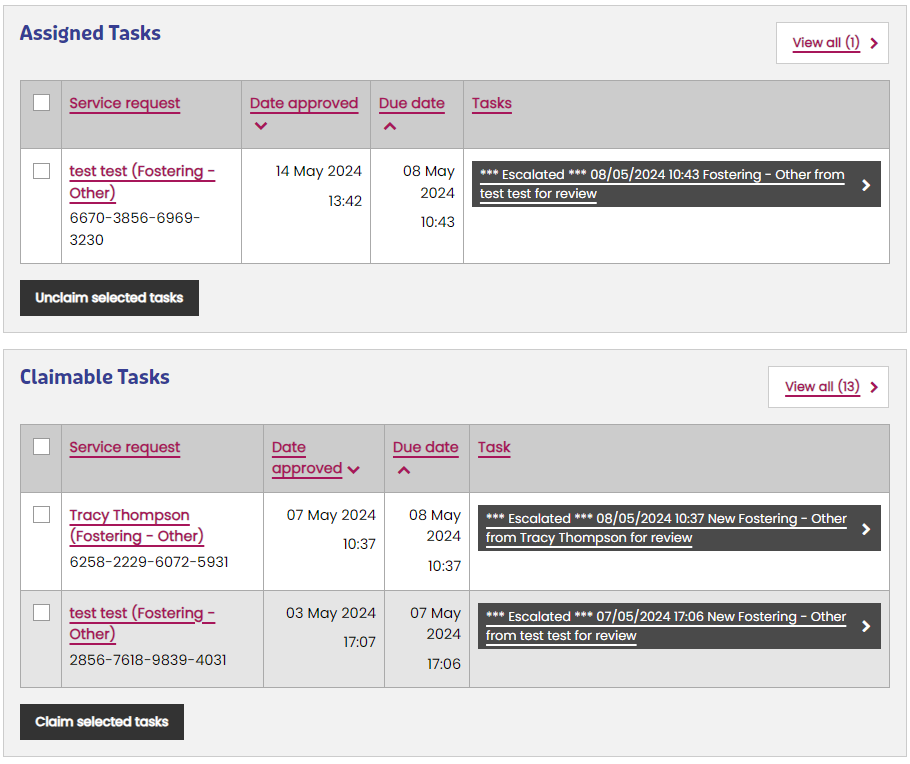
Enquiries that aren't being worked on are listed in the claimable tasks table. When someone starts working on an enquiry, it moves into their assigned tasks panel and can't be seen by anyone else. Only one person can work on a task at a time.
The links in the left-hand column display a summary of the enquiry. The buttons in the right-hand column open the enquiry to be worked on.
Technical Note
The Self Service Articles section of the technical information describes how these pages are set up.
Initial Contact
At this stage, a member of the central fostering team has opened the new enquiry case and attempts to make contact with the enquirer.
Click on the task button to start working on it:

Next, find and open the "Additional" tab. It displays a summary of the actions that have been taken so far:
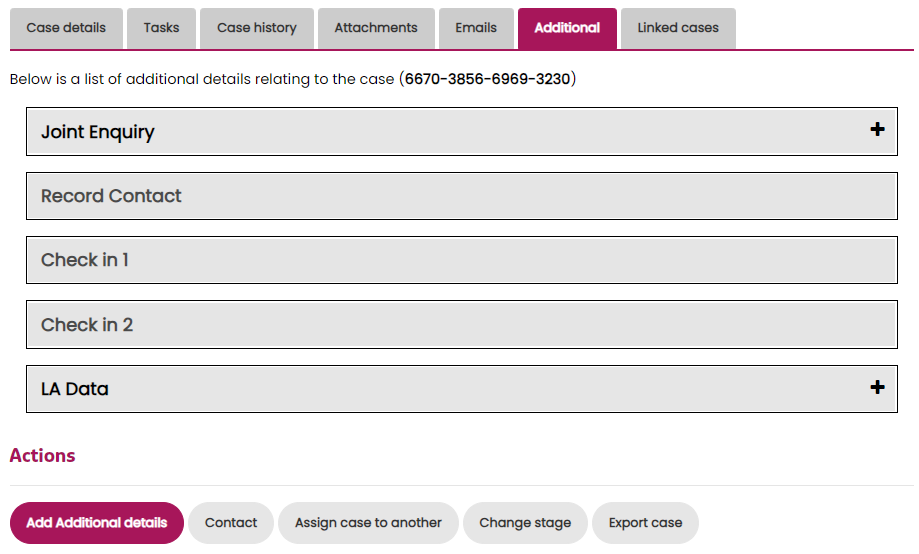
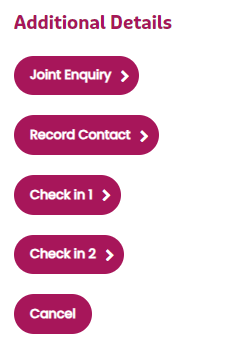
To record a contact or make an update, press the "Add additional details" button, then pick which part you'd like to update:
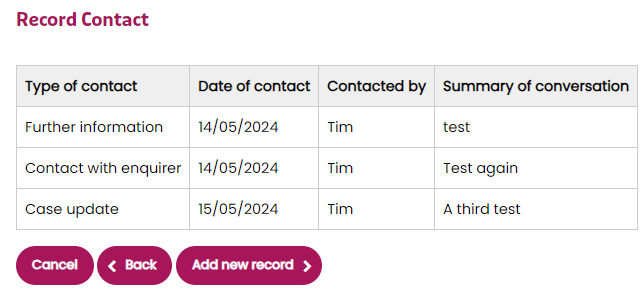
Recording a contact lets you enter:
- Type of contact
- Date of contact
- Contact success
- Who made contact
- The outcome
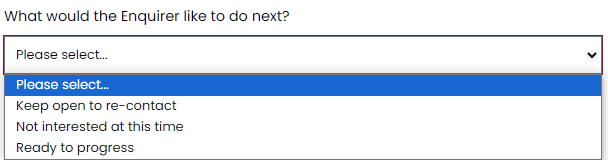
If contact was successful you can record what the enquirer would like to do next:
Multiple contact records can be added over time:
Successful Contacts
Once successful contact is made, the case SLA is cleared. The three possible outcomes of a successful contact are:
- Keep open to re-contact - The case status will change to "Ongoing contact"
- Not interested at this time - The case status will change to "First contact made"
- Ready to progress - The case status will change to "First contact made"
If an attempt to contact the enquirer was unsuccessful, and you want a reminder to contact again, go to the main Case Details screen and set a new completion target.
The enquiry case will stay at this stage, and in the list of initial contacts, until the Expression of Interest task is started.
Expression of Interest
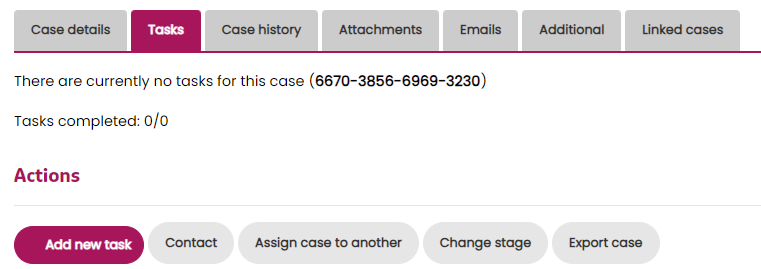
If the enquiry is going to become an Expression of Interest (EOI), the EOI task should be started.
On the Tasks tab, press the "Add new task" button:
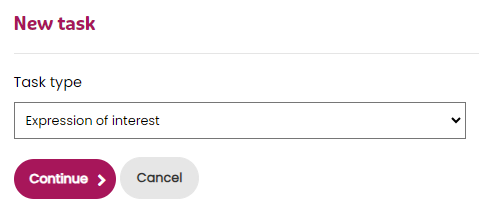
The pick "Expression of interest" from the new task drop-down to start the EOI task:
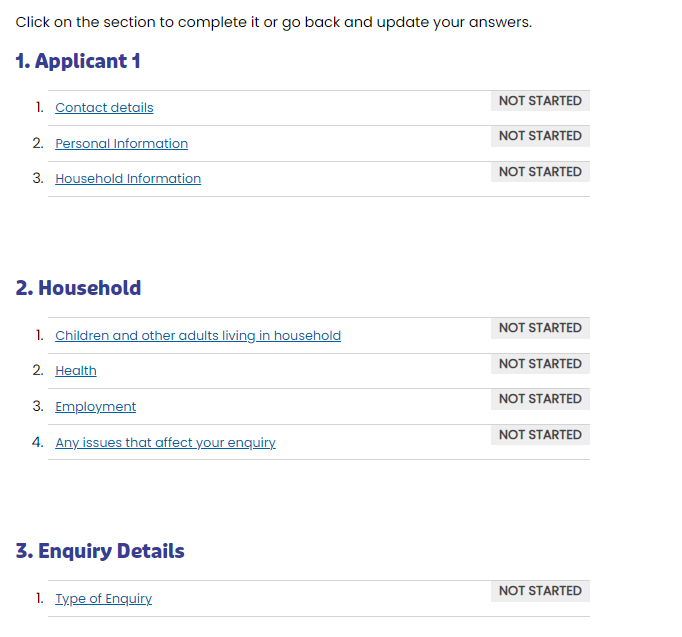
The EOI is a form that asks lots of questions about the enquirer:
Once the EOI task is started, the case automatically moves to the "EOI" stage with an "EOI in progress" status, and will appear in the EOI section of the hub.
The EOI task will sit in this tray for as long as it takes to complete, and will be assigned to the case manager who started it. It may be saved and revisited as required, and is designed to be completed whilst on the phone with the enquirer.
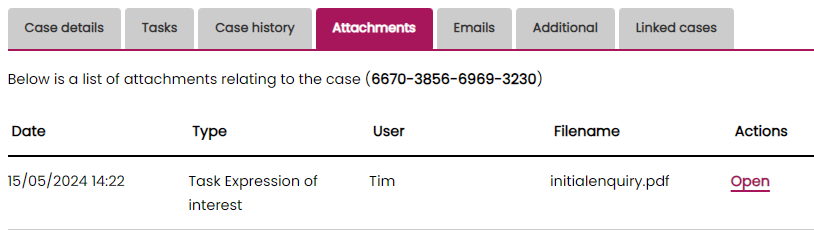
When the task is complete (ie the form is submitted), all of the answers entered into the form are compiled into a PDF, which can be downloaded from the attachments tab:
The case will stay at this stage, and in the list of EOI tasks, until the "Authority notification" or "Refer to LA" task is completed.
Refer to the Local Authority
Once the EOI is complete, the enquiry is ready to be handed over to the Local Authority for further processing. There are two different ways this can be done, so check with your team which method you use.
Both methods use a new task, which you can create from the Tasks tab, in exactly the same way as creating the EOI task.
Referring to the LA Task
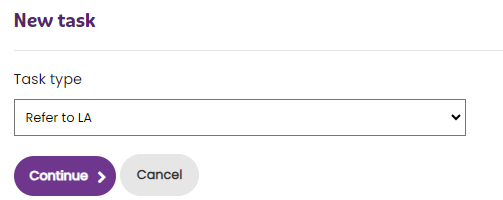
To refer the enquiry to the LA, create a "Refer to LA" task:
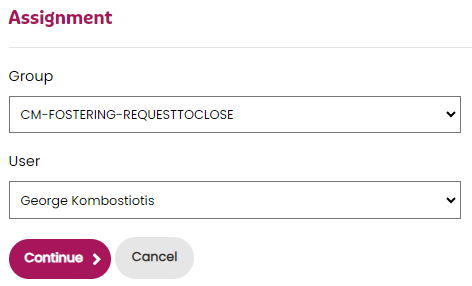
Step two in creating the task will ask you who the task needs to be assigned to. The "Group" drop-down lists local authorities:
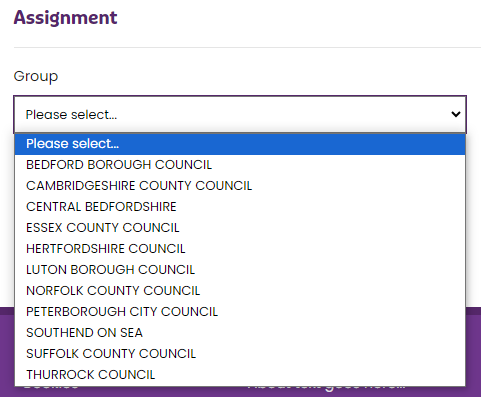
The "User" drop-down lets you pick a specific user, or "All users in group" so that anyone in the group can work on the task.
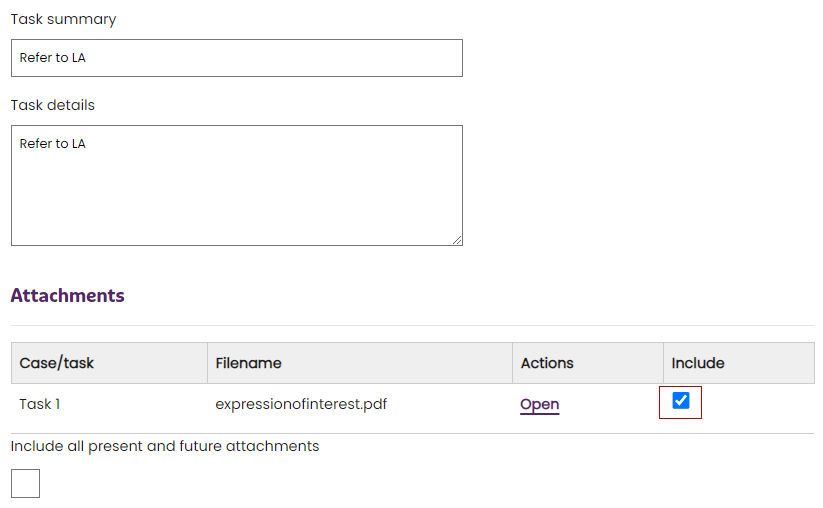
The third step in creating the task lets you enter a title and description of the task. You MUST also check the box next to the EOI PDF so it gets included in the task and is available to the person from the local authority to view:
Completing the Task
Tasks are listed in the "Referrals" article, which is secured to the FOSTERING-PARTNERS user group.
The task should be completed by a user in the relevant LA group. The user needs to download the PDF and complete the task with a suitable response.
When the task is completed, the following happens automatically:
- The SLA for check in 1 is set
- The status changes to "Referred to LA"
- The stage changes to "Referred to LA"
- A new row is added to the custom database tables - see Local Authority Updates and CSV Exporter for more information about how records are kept
Using SharePoint - Authority Notification Task
If your team uses Microsoft SharePoint to share documents, download the PDF generated by the EOI task and move it into the relevant SharePoint directory.
Next, create and use the "Authority Notification" task to generate an email that will be sent to the LA. The email includes some headline information about the application and the location details for the EOI PDF in SharePoint.
Once this email is sent, the case is automatically moved to the "Referred to LA" stage.
Check-in 1 and Check-in 2
Once the EOI has been referred, you can make contact with the enquirer to check how things are progressing. These check-ins are logged in the system as Check in 1 and Check in 2.
Check-ins are logged using the Additional tab, in the same was as the initial contact. Open the tab, and press the "Add additional details" button:
Next pick "Check in 1" or "Check in 2".
You can record:
- Whether the check-in call was successful
- The date the check -in was attempted (if unsuccessful)
- The date the next call is scheduled for (if unsuccessful)
- The date of contact (if successful)
- The outcome of the successful check-in
There are three possible outcomes of a successful check-in:
- Progressing
- On hold
- Withdrawn
SLAs after Check-in
If check-in 2 is complete, the SLA is cleared.
If check-in 1 is complete, the SLA is set to ten weeks in the future (50 working days).
If the check-in wasn't successful, the SLA is set to the next scheduled call date entered into the form.
Stages after Check-in
When each check-in is complete, the stage changes to "Check in 1" or "Check in 2" as appropriate.
Status after Check-in
When each check-in is complete, the status changes to "Check in 1 complete" or "Check in 2 complete" as appropriate.
Logging other Calls
Throughout the enquiry you can record updates to the case using the Additional tab, in the same way as recording check-ins and the initial contact.
Updates can be categorised as:
- Case update
- Contact with enquirer
- Contact with LA
- Further information
If a contact has been unsuccessful and you want to set a reminder, you can return to the main Case Details screen and set a new completion target.
Remember to unclaim the case when you have done this so it can be picked up by someone else.
Closing a Case
Enquiry cases can't be closed without the case first being reviewed.
Request to Close
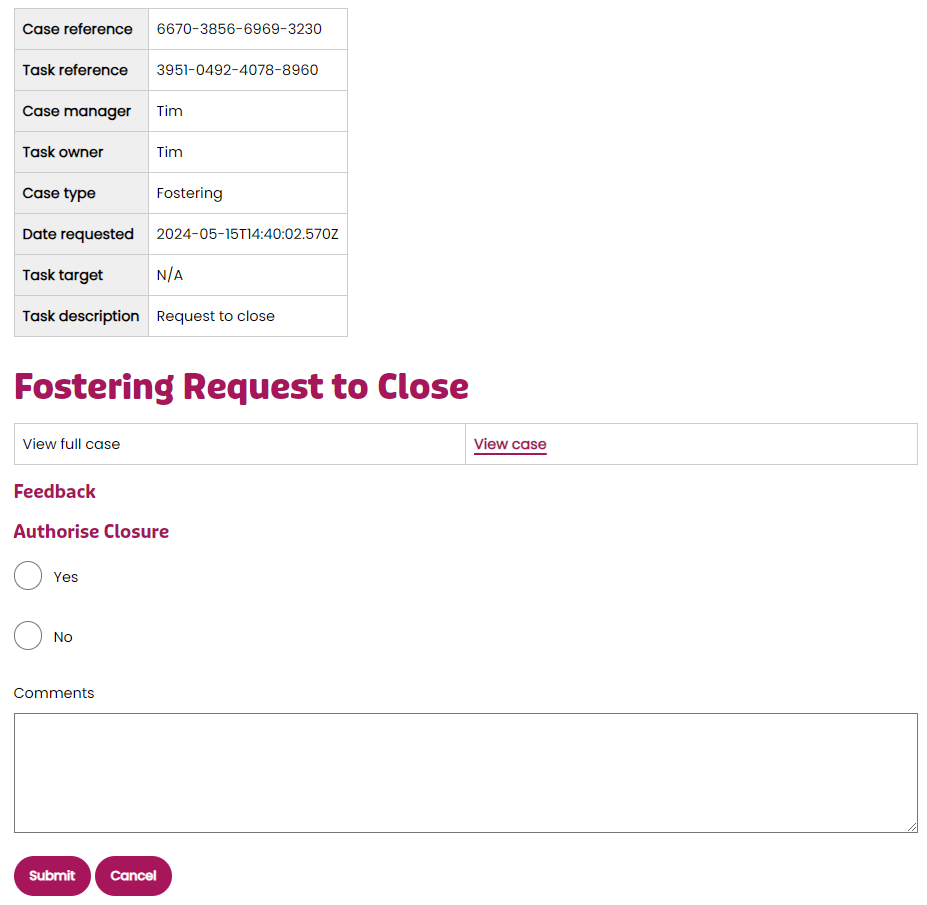
If for any reason an enquiry is not progressing and you want to close it, a "Request to Close" task should be created from the Tasks tab, in exactly the same way as creating the EOI task. When creating the task, you'll be able to select the group, and user, to assign the task to:
The Request to Close task displays a summary and a link to view the full case:
Closure in Progress
If authorised, the case stage changes to "Closure in progress", the case moves to the "Close in Progress" list of cases, and a Close button will appear in the row of available actions:

When you close the case, you'll be prompted to select a reason:

Share this page


